Stop Wasting $250–$700: Homeowners, Find AC Refrigerant Leaks Safely
If your air conditioner blows lukewarm air, hisses, or has grown ice on the copper lines, you likely have an AC refrigerant leak. Shut the system off now, open a window if the smell is strong or anyone feels dizzy, and avoid breathing near the unit. This is not a DIY recharge job. Refrigerant handling requires an EPA-certified technician, and if anyone shows symptoms of exposure, contact Poison Control or call 911 immediately.
TL;DR:
- Most refrigerant leaks originate from the evaporator coil due to formicary corrosion caused by household VOCs and humidity, often resulting in multiple tiny holes.
- Signs of a leak include ice buildup on lines, hissing sounds, oily residue, and refrigerant smells, but ambiguous symptoms like warm air or rising bills require professional diagnosis.
- Detecting leaks involves inspecting visible lines, listening for hisses, performing soap bubble tests, and marking suspected spots, all before system opening and refrigerant handling.
- Repair costs vary from 150 to over 1,000 dollars depending on the leak source, with coil replacement being the most expensive and frequent repairs involving simple fittings or valve cores.
- Ignoring leaks leads to compressor wear, longer run times, increased utility bills, and potential system failure, making early detection and professional repair essential.
Table of Contents
- Signs of an AC Refrigerant Leak vs. Other Cooling Problems
- How Do You Find a Refrigerant Leak Safely?
- Where Do AC Refrigerant Leaks Usually Start?
- What Are the Health Risks of a Refrigerant Leak?
- How Much Does It Cost to Repair an AC Refrigerant Leak?
- When Should You Call a Professional?
- Preventing Future Refrigerant Leaks
- How Tru Comfort Handles Refrigerant Leak Diagnosis
- Confirming Refrigerant Type and Recharge Amount
- Recovering and Disposing of Leaked Refrigerant
- What Happens If You Ignore an AC Refrigerant Leak?
- Handling a Minor Leak Safely as a Homeowner
- Why the “Just Top It Off” Advice Is Bad for Your System
- Book a Diagnostic Visit With Tru Comfort
- Sources
Signs of an AC Refrigerant Leak vs. Other Cooling Problems
Not every cooling complaint traces back to lost refrigerant. Some symptoms are nearly unmistakable; others overlap with dirty filters, weak airflow, or electrical faults. Sorting the two saves you a wasted service call and helps your technician diagnose faster.
Highly specific signs of an AC freon leak include:
- Ice buildup on the evaporator coil or the thick suction line running to your outdoor unit. Low refrigerant pressure causes the line to drop below freezing, and moisture in the air turns to frost.
- A hissing or bubbling sound near the indoor coil, outdoor unit, or line set. That’s often the sound of pressurized gas escaping through a pinhole or loose fitting.
- Oily residue on copper lines or connections. Refrigerant oil travels with the gas, so a leak often leaves a visible film at the leak point.
Ambiguous signs that need more context include lukewarm air (could be a leak, a failing compressor, or a dirty condenser), longer-than-normal run times, uneven cooling room to room, rising humidity indoors, and creeping utility bills. These low refrigerant symptoms in an AC unit deserve attention, but they don’t confirm a leak on their own.
Before calling for service, run a quick triage: check the thermostat setting isn’t the issue, glance at outdoor and indoor coils for frost or oil, and note whether the sound is constant or intermittent. Photograph anything unusual, log the date and time symptoms started, and track whether cooling has gotten worse day by day. That timeline is genuinely useful. Handing a technician a written progression, rather than “it’s been off lately,” cuts diagnostic time and often cost.
How Do You Find a Refrigerant Leak Safely?
Finding a refrigerant leak follows a logical order: narrow it down yourself, then let a certified technician verify and fix it. Skipping straight to a recharge without locating the leak just delays the real problem and wastes refrigerant.
Here’s the safe sequence for homeowners:
- Kill power to the outdoor unit at the disconnect switch before inspecting anything.
- Inspect visible lines and fittings for oily residue, which usually marks the leak site.
- Listen for hissing near joints, valves, and the indoor coil access panel.
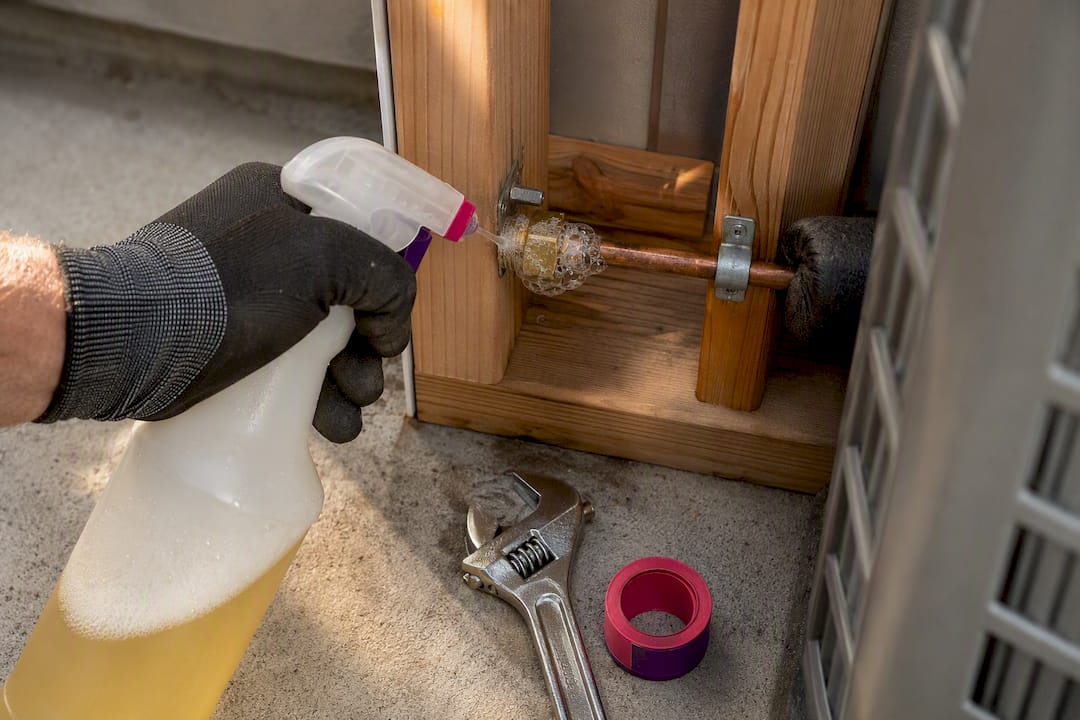
- Run a soap bubble test on suspected spots. Mix a few drops of dish soap with water, brush it onto fittings and valve stems, and watch for bubbles forming, which signals escaping gas.
- Check for ice on the suction line or indoor coil, and photograph anything you find.
- Mark suspected locations with tape or chalk so your technician doesn’t have to start from scratch.
Stop there. Refrigerant is regulated, and opening the sealed system, adding refrigerant, or brazing a line without EPA Section 608 certification is both illegal for most homeowners and genuinely risky.
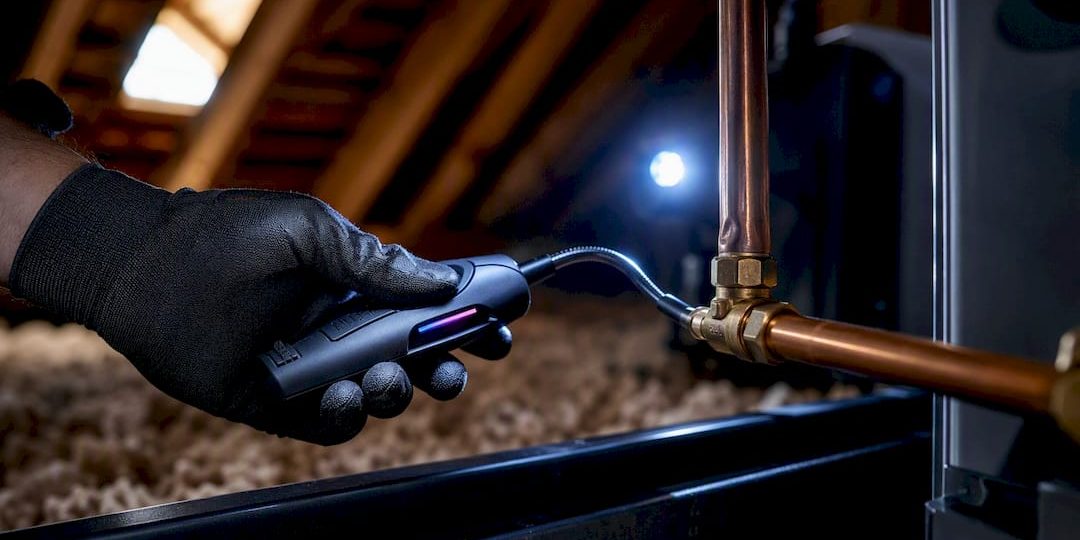
Once a technician arrives, they combine several methods because no single tool catches everything. An electronic sniffer narrows down the general area fast, soap bubbles confirm the exact point, UV dye added to the system reveals slow or intermittent leaks that only show up under certain conditions, and nitrogen pressure testing verifies the fix holds before any refrigerant goes back in. This layered leak detection guide approach exists because pinhole leaks in coils can be maddeningly hard to isolate with just one method.
Pro Tip: Keep the soap bubble mix in a spray bottle rather than a bowl. It’s easier to apply evenly on vertical fittings and won’t drip refrigerant oil back onto the floor.
Where Do AC Refrigerant Leaks Usually Start?
The evaporator coil inside your air handler is the most common failure point, responsible for the large majority of residential leaks. The mechanism is called formicary corrosion: household VOCs from cleaning products, paint, and even some carpets combine with humidity on the coil’s surface and slowly eat pinhole-sized tunnels through the copper, a pattern documented in industrial toxicology research on refrigerant exposure. It’s slow, it’s invisible until the coil is already perforated, and it often produces multiple small leaks rather than one obvious hole.
Other frequent leak points include:
- Schrader valve cores — the small spring-loaded valves used to access the system, which wear out or seat improperly.
- Service port caps and O-rings, especially if they weren’t tightened correctly after a past service visit.
- Flare fittings where line sections connect, which can loosen from vibration over years.
- Line-set rubbing against ductwork, framing, or the cabinet, wearing through the copper over time.
- Brazed joints that were never fully sealed or that cracked from thermal stress.
- Outdoor coil damage from hail, weed trimmers, or falling debris.
Valve cores, caps, and flare fittings are usually simple, inexpensive fixes. Coil pinholes from formicary corrosion, especially when they show up in more than one spot, usually point toward coil replacement instead of a patch.
What Are the Health Risks of a Refrigerant Leak?
Small, brief exposures to leaking refrigerant are rarely dangerous on their own. Refrigerant gas displaces oxygen in enclosed spaces, and higher concentrations change the picture fast.
According to MedlinePlus, high-concentration or intentional inhalation of refrigerant gas can cause dizziness, fainting, irregular heart rhythms, coma, frostbite from direct skin contact, or in severe cases, sudden death.
Symptoms to watch for after a suspected leak include headache, dizziness, nausea, and shortness of breath, especially if you’ve been in a closed room near the unit for an extended period. Some refrigerant types are also flammable, which is one reason EPA safety guidance stresses ventilation over improvised fixes and keeps handling restricted to certified technicians.
If anyone shows symptoms: get them into fresh air immediately, open windows and doors, and avoid any ignition sources nearby. Contact Poison Control for guidance on mild to moderate symptoms. Call 911 for loss of consciousness, chest pain, or severe breathing difficulty. Don’t go back into the space until it’s ventilated and a technician has assessed the system.
How Much Does It Cost to Repair an AC Refrigerant Leak?
Repair cost tracks almost entirely with how much of the system has to be opened up, and how many separate leak points a technician finds.
Low-cost repairs ($150 to $350, usually same-day):
- Schrader valve core replacement
- Service cap or O-ring swap
- Tightening or re-flaring a loose fitting
Mid-cost repairs (several hundred dollars, may need a return visit):
- Brazing a pinhole or crack in an accessible line
- Replacing a damaged section of line set
- Repairing or replacing a leaking service valve
High-cost repairs (often $1,000 or more):
- Full evaporator coil replacement, especially when formicary corrosion has created multiple pinholes
- Cases where corrosion has spread far enough that patching one spot just means another leak next season
Trane’s cost data puts the typical national repair range in a broad cost band, with most jobs landing near the middle level, and a full refrigerant recharge adding a variable surcharge depending on system size.
One habit makes all of this worse: recharging refrigerant repeatedly without actually finding and fixing the leak. It hides the real problem, stresses the compressor, and burns through refrigerant that just leaks out again. The right sequence is always detect, repair, recover and vacuum, then recharge, not skip straight to the last step.
When Should You Call a Professional?
Some symptoms mean stop using the system and call today, not next week.
- Hissing sounds, visible oil residue, or frozen coils
- Any symptoms of exposure in people near the unit, even mild ones
- The system running constantly without actually cooling the space
Milder signs, like slightly higher bills or one warm room, can usually wait for a scheduled inspection rather than an emergency visit.
Under EPA Section 608, only certified technicians may purchase, handle, or recharge refrigerant. The rule also shapes repair timelines: for larger commercial systems, EPA requires leak repair within 30 days of discovery or a documented retirement plan, and while residential systems fall under lighter recordkeeping, most reputable technicians follow the same discipline of documenting the leak, the fix, and the verification before recharging.
On a first visit, expect a technician to sniff out the general leak area electronically, confirm it with a soap bubble test, mark the exact spot, and give you a repair-versus-replacement estimate based on the coil’s age and how many leak points they find. If repair goes ahead, refrigerant recovery and a vacuum hold happen before any new refrigerant goes back in. If you’re weighing repair against a full system replacement, ask directly how many leak points they found and how old the coil is.
Preventing Future Refrigerant Leaks
Annual maintenance catches most leak precursors before they become emergencies. A proper tune-up includes checking Schrader cores and service cap tightness, inspecting coils for early corrosion signs, confirming the refrigerant charge matches spec, and clearing the condensate drain so airflow across the coil stays even.
A few habit changes help too:
- Keep VOC-heavy products (paint, aerosol cleaners, new carpet adhesive) away from indoor air handlers, since formicary corrosion feeds on those compounds combined with humidity.
- Schedule inspections before peak cooling season, not after something already sounds wrong.
- Keep the outdoor unit clear of debris, and protect it from impact during yard work.
Pro Tip: Ask your technician to photograph the coil during every annual visit. Comparing photos year over year catches early corrosion long before it becomes a hissing leak.
Regular inspection through a maintenance plan costs far less than emergency coil replacement, and it catches loose fittings and worn valve cores while they’re still a five-minute fix.
How Tru Comfort Handles Refrigerant Leak Diagnosis
Tru Comfort Heating & Cooling is a family-owned HVAC company serving New River, Arizona, and its NATE-certified technicians follow the same detect-first approach outlined above: locate and document the leak, recover refrigerant per EPA guidelines, and give homeowners a straight repair-versus-replacement estimate before doing any work.
Technicians work on a non-commissioned basis, which matters most exactly at the moment a leak is found. There’s no incentive to push a coil replacement when a valve core would fix it, or vice versa. Emergency service is available for cases involving hissing, visible exposure symptoms, or a system that’s stopped cooling entirely, and ongoing maintenance plans exist for homeowners who’d rather catch corrosion before it becomes a repair bill.
Confirming Refrigerant Type and Recharge Amount
Before any recharge happens, a technician needs two numbers: which refrigerant your system uses and how many pounds it holds. Most residential systems installed since the 2010s run on R-410A, though some newer units use lower-global-warming-potential blends, and anything installed before roughly 2010 may still run on R-22, which is far more expensive and harder to source.
The nameplate on the outdoor condenser lists both the refrigerant type and the factory charge weight, usually stamped in pounds and ounces. That factory number isn’t automatically what the system needs at recharge time, though. Line set length, any modifications made during past repairs, and the amount already lost to the leak all affect the actual amount required. That’s why a technician weighs in refrigerant by the pound during a recharge rather than guessing from the nameplate alone, and why guessing the charge yourself, even if you could legally buy refrigerant, would likely leave the system over or undercharged. An overcharged system loses efficiency and stresses the compressor almost as much as an undercharged one does.
Recovering and Disposing of Leaked Refrigerant
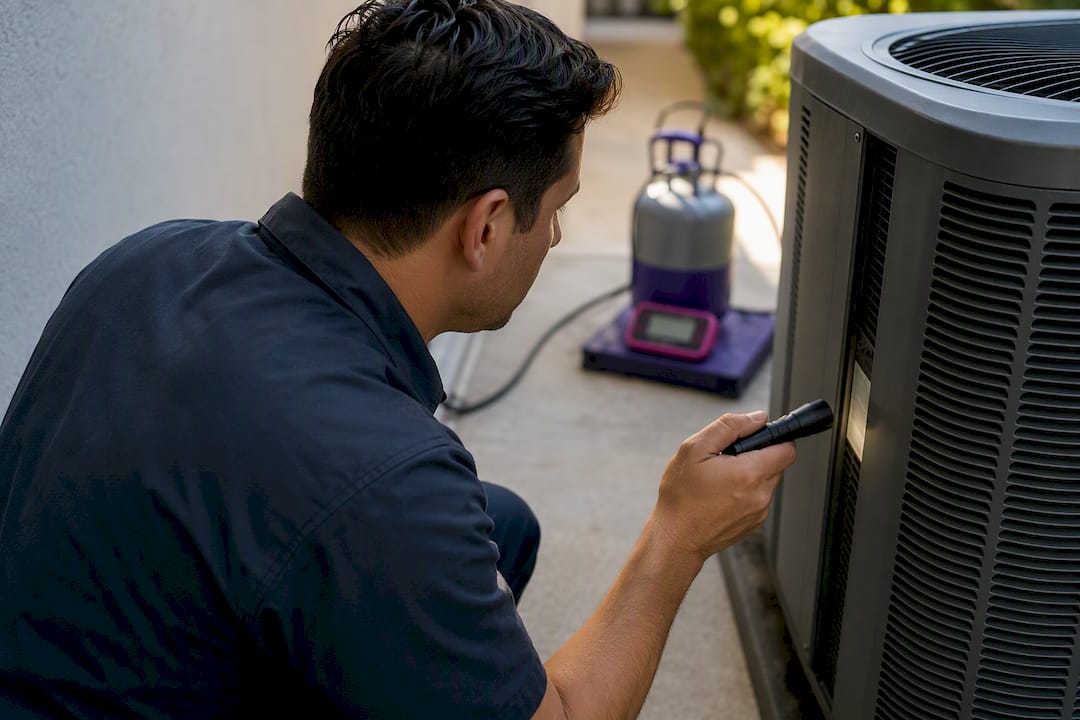
Refrigerant can’t legally be vented into the air, not even the small amount left in a line section being replaced. EPA rules require certified technicians to recover any remaining refrigerant into an approved storage cylinder using a recovery machine before opening the system for repair.
Recovered refrigerant gets handled one of three ways depending on its condition: reused in the same system after the leak is fixed, recycled on-site if it’s still relatively clean, or sent to a certified reclamation facility if it’s contaminated and needs to be reprocessed to meet purity standards before reuse. None of this is optional paperwork. Refrigerants like R-410A carry meaningful global-warming potential, and uncontrolled venting contributes directly to atmospheric harm well beyond the leak itself. This is also, practically speaking, why you can’t buy refrigerant at a hardware store the way you might buy engine coolant. The recovery and handling requirements under Section 608 exist specifically to keep refrigerant out of the atmosphere and out of untrained hands.
What Happens If You Ignore an AC Refrigerant Leak?
An undetected leak doesn’t stay small. As refrigerant charge drops, the compressor works harder to move the reduced volume of gas, running hotter and wearing out faster than it would at proper charge. That’s often how a $200 valve core problem turns into a compressor failure and a much larger repair or full system replacement.
Reduced charge also means longer run times to reach the same indoor temperature, which shows up directly on utility bills long before most homeowners connect it to a leak. Meanwhile, the low-pressure side of the system runs colder than it should, which is exactly why ice forms on the suction line and evaporator coil. That ice acts as insulation, making the system even less efficient in a compounding cycle that ends with iced-over coils, a straining compressor, and a system running nearly nonstop for a fraction of the cooling output it once delivered.
Left long enough, an undiagnosed leak shortens the lifespan of the whole system, not just the coil where it started.
Handling a Minor Leak Safely as a Homeowner
If your triage points to a small, accessible leak, like a loose flare fitting or a worn Schrader cap, there’s a safe, limited amount you can do before the technician arrives.
Start by shutting off power to the outdoor unit at the disconnect, since running a leaking system wastes refrigerant and stresses the compressor unnecessarily. Next, do the soap bubble test on any suspected fitting and note exactly where bubbles form. If you find a loose flare nut, you can typically hand-tighten it slightly with a wrench, but stop well short of over-tightening, which can crack the flare and turn a minor leak into a major one. Photograph the spot, mark it with tape, and write down when you first noticed symptoms.
What you should not do: open the low-pressure or high-pressure ports, add refrigerant from any source, or attempt to braze or solder a line yourself. That crosses from homeowner-safe territory into work that’s both regulated and genuinely dangerous without proper equipment. Hand your notes and photos to the technician when they arrive. It turns a diagnostic visit into a repair visit far more often than starting from scratch.
Why the “Just Top It Off” Advice Is Bad for Your System
The most common piece of bad advice about refrigerant leaks isn’t wrong because it’s careless. It’s wrong because it treats a symptom as the problem. Recharging a leaking system without finding the leak feels like a fix because the air gets cold again for a while. It’s actually just buying a few weeks before the same symptoms return, usually worse, because the compressor has been running on low charge in the meantime.
What actually matters most here is the diagnostic order, not the tools. A homeowner with a soap bottle and a flashlight who checks visible fittings before calling anyone is doing more good than someone who calls immediately for a recharge and skips the leak search entirely. The industry’s own cost data backs this up indirectly: refrigerant recharge alone runs $250 to $700, and if you’re paying that every season because nobody located the actual pinhole, you’ve paid for a permanent fix several times over without getting one.
If there’s one thing worth prioritizing above the checklist, it’s this: treat symptoms as a reason to investigate, not a reason to recharge. That single shift in thinking prevents most of the expensive outcomes described above.
Book a Diagnostic Visit With Tru Comfort
If you’ve run through the checks above and still suspect a leak, the next move is a diagnostic visit, not a guess. Technicians bring electronic detection equipment and nitrogen pressure testing to confirm exactly where the leak is before recommending a fix, so you’re not paying for a recharge that disappears in a month.

Before your appointment, clear access to both the indoor air handler and the outdoor condenser, and have your notes ready: when symptoms started, what you observed during your own soap bubble check, and any photos of ice, oil residue, or the marked leak location. That information alone can shave real time off the visit. Emergency service is available if anyone in the home has shown signs of exposure or the system has stopped cooling entirely. For a standard diagnostic booking, visit Tru Comfort’s HVAC services page or head to the main site to schedule a visit and ask about maintenance plans that catch leaks like this before they start.
Sources
- MedlinePlus — Inhalation poisoning
- EPA — Refrigerant safety
- NCBI / Industrial & Environmental Toxicology — HFC-134a and refrigerant toxicity context
- AC Direct — R-410A leak detection guide
- Trane — AC refrigerant leak detection and repair