Duct Leakage Test: What Your Results Actually Mean
A duct leakage test measures how much conditioned air escapes your duct system by pressurizing it to 25 pascals (roughly 0.1 inches of water column) with a calibrated fan and recording the airflow required to hold that pressure, reported in CFM25. That single number tells you whether your ducts are tight enough to meet code, qualify for ENERGY STAR, or simply stop hemorrhaging the air you’re paying to heat and cool. A professional test produces a signed report with your CFM25 result, the conditioned floor area used for normalization, and the test type — documentation that satisfies building inspectors and real-estate disclosures alike.
Key Takeaways
Many homes waste.
| Point | Details |
|---|---|
| CFM25 is the metric that matters | Divide your CFM25 result by conditioned area ÷ 100; compare to the 4 CFM25/100 ft² IRC base threshold. |
| Test timing changes what’s accessible | Rough-in testing (before drywall) gives the best repair access; final testing confirms code compliance after installation. |
| Mastic beats cloth duct tape every time | Use mastic or UL 181 foil tape for durable seals; cloth-backed duct tape fails within a few years. |
| Retest after sealing | A before/after retest is the only way to confirm that repairs actually moved your CFM25 below the target threshold. |
| Trucomfortaz provides the full service | NATE-certified technicians in New River, AZ deliver a signed CFM25 report, repair plan, and optional retest in a single service visit. |
Table of Contents
- What does a duct leakage test actually measure?
- U.S. standards, timing, and who performs an acceptable test
- What equipment is used and how does the test work?
- How to interpret your CFM25 results
- What does professional testing cost, and can you DIY it?
- How technicians find leaks and what sealing actually involves
- What to expect when Trucomfortaz performs your duct test and repair
- The case for testing before you replace equipment
- Tru Comfort’s duct testing and repair service in New River, AZ
- Sources
What does a duct leakage test actually measure?
The test reports leakage in CFM25: cubic feet per minute of air escaping at 25 pascals of pressure. That pressure is standardized so results are comparable across houses, climates, and equipment types. Two distinct test types exist, and they answer different questions.
Total duct leakage captures every leak in the system, including leaks between ducts inside the conditioned envelope. Leakage to outdoors (LTO) isolates only the air escaping to unconditioned spaces — attics, crawlspaces, garages — which is the leakage that directly drives energy loss and comfort problems. LTO is the harder number to hit and the one most programs care about most.
Why does it matter so much? Leaky air ducts don’t just waste energy — they create pressure imbalances that pull unconditioned, dusty, or humid air into the living space, drive up utility bills, and can cause backdrafting in combustion appliances.
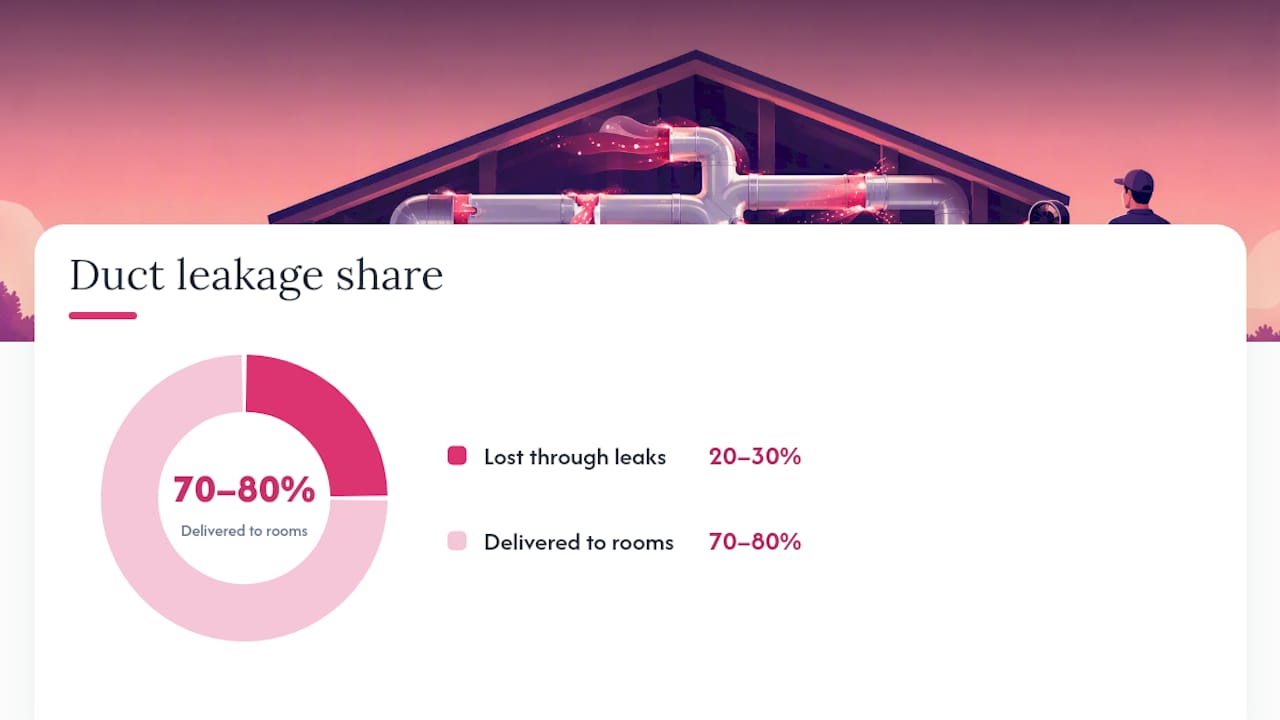
The average American home loses roughly 20–30% of conditioned air through duct leaks — meaning nearly a third of what your system produces never reaches the rooms it was meant to serve.
The leaks that matter most tend to cluster in a few predictable spots:
- Supply plenums and the air-handler cabinet (often the single largest leak point)
- Flex-duct collar connections at the trunk or boot
- Register boots where sheet metal meets drywall or subfloor
- Return-air chases built from framing cavities rather than sealed metal
Micro-leaks at seams that look sealed to the eye can account for a surprising share of total loss. Only a calibrated duct-blaster test establishes a reliable baseline — visual inspection alone routinely misses them.
U.S. standards, timing, and who performs an acceptable test
Several overlapping standards govern duct leakage testing in the U.S., and knowing which one applies to your project determines the threshold you need to hit.
Key standards and trust signals:
- RESNET / ANSI/RESNET/ICC 380: The dominant testing protocol for residential construction. RESNET-approved testing uses calibrated duct testers such as the Minneapolis Duct Blaster or the Retrotec Duct Tester, and results are normalized to conditioned floor area (CFM25 per 100 ft²). A HERS rater certified by RESNET is the standard third-party tester for new construction.
- ENERGY STAR (v3/v3.1): Requires leakage to outdoors at or below 4 CFM25 per 100 ft² of conditioned floor area, or a total leakage limit depending on program version and climate zone.
- IRC 2021 (Section R1103.3.7): Model-code language requires measured duct leakage testing and a written report in jurisdictions that adopt the provision. The base threshold is 4 CFM25 per 100 ft² for total leakage. Local amendments frequently change triggers or tighten thresholds — always confirm with your Authority Having Jurisdiction (AHJ).
- NATE-certified technicians: For existing homes and retrofit work, a technician holding NATE certification has demonstrated competency in HVAC diagnostics, including duct testing. NATE certification doesn’t replace HERS rater credentials for new-construction code compliance, but it’s the right credential for diagnostic and repair work.
When is the test performed?
Testing happens at two distinct project stages. A rough-in test is done after ducts are installed but before drywall closes the walls — registers are not yet in place, so the tester caps all open ends. This is the preferred timing for new construction because leaks are still accessible. A final test happens after everything is installed and the system is operational. When a home has multiple HVAC systems, each system is typically tested separately.
Pro Tip: Confirm with your local building department whether your jurisdiction has adopted the IRC duct-testing provision and whether it applies to replacements or only new construction. Many Arizona jurisdictions have adopted versions of the IECC that include duct-testing requirements for new builds.
What equipment is used and how does the test work?
Core equipment
- Calibrated duct blaster fan (Minneapolis Duct Blaster or Retrotec Duct Tester): the pressurization source
- Digital manometer / flow meter: reads duct pressure and calculates CFM25
- Blower door: required when testing leakage to outdoors (LTO), to simultaneously depressurize the house
- Register plugs, cardboard, and tape: used to temporarily seal all supply and return registers during setup
Step-by-step: total duct leakage test
- Close all windows, exterior doors, and fireplace dampers.
- Seal every supply and return register with plugs or taped cardboard.
- Connect the duct blaster fan to the air-handler cabinet or a convenient return register opening.
- Pressurize the duct system to 25 pascals while monitoring with the manometer.
- Record the CFM reading at 25 Pa — this is your total duct leakage (CFM25).
- Document conditioned floor area, test pressure, equipment serial numbers, and test type on the report.
Step-by-step: leakage to outdoors (LTO) test
The LTO procedure pairs the duct blaster with a blower door and uses a two-measurement averaging method:
- Set up the blower door in an exterior door opening.
- Seal all registers as above and connect the duct blaster.
- First measurement (supply side): pressurize the duct system to 25 Pa with the blower door simultaneously depressurizing the house to 25 Pa. Record CFM25 from the duct blaster.
- Second measurement (return side): move the duct blaster probe to the return side and repeat.
- Average the two readings to calculate LTO.
- Record both measurements and the average on the signed report.
Pro Tip: Most professionals prefer depressurization (pulling air out of the ducts) over pressurization for the LTO test because it better simulates real operating conditions and reduces the risk of dislodging loose insulation inside ducts. Ask your tester which method they use and why.
How to interpret your CFM25 results
Results only mean something once you normalize them to your home’s conditioned floor area. The formula is straightforward:
Normalized leakage = CFM25 ÷ (conditioned area ÷ 100)
Example: A 2,000 ft² home tests at 160 CFM25 total leakage. Normalized: 160 ÷ 20 = 8 CFM25 per 100 ft² — double the IRC base threshold of 4, and a clear repair priority.
What to do with your number:
- Under threshold: You’re in good shape. Keep the report for resale documentation and retest after any major duct modification.
- Near threshold (within 1–2 CFM25/100 ft²): Targeted sealing at the highest-leak locations (air-handler cabinet, plenums) will likely push you over the line. A retest after sealing confirms compliance.
- Well over threshold: Plan for a full sealing campaign. Depending on duct age, location, and condition, duct replacement may be more cost-effective than sealing a deteriorated system.
Codes and programs normalize to floor area so that a 1,200 ft² bungalow and a 3,500 ft² house are judged on equal footing. Always verify whether your project’s compliance path uses total leakage or LTO — they are not interchangeable, and using the wrong metric is one of the most common compliance errors.
What does professional testing cost, and can you DIY it?
A standalone duct-blaster test typically runs $150–$350; bundled with a full home energy audit or HVAC assessment, expect $300–$600. Those ranges reflect national averages — local market conditions, travel distance, and whether an LTO test (which requires a blower door) is included all affect the final price.
DIY options exist, but they have hard limits. A pressure-pan test (a flat plate with a pressure tap held over a register while a blower door runs) can identify which duct runs leak to outdoors without quantifying CFM25. A smoke pencil or theatrical fog machine reveals leaks at accessible joints. Both are genuinely useful for locating problems.
What DIY methods cannot do: produce a calibrated CFM25 reading, generate a signed report acceptable to a building inspector, or verify that sealing work actually brought you below a code threshold. The contrast between DIY and professional approaches is sharpest when code compliance, a rebate program, or a real-estate transaction is on the line.
Hire a professional when:
- Ducts run through unconditioned attic or crawlspace (highest energy stakes)
- You’re installing new HVAC equipment and want a before/after baseline
- A permit or ENERGY STAR certification requires a signed CFM25 report
- You have persistent comfort complaints — hot rooms, humidity swings — that suggest pressure imbalances
- Safety concerns exist (combustion appliances, potential backdrafting)
How technicians find leaks and what sealing actually involves
Detection methods
Visual inspection catches the obvious stuff: disconnected flex duct, missing mastic at boot connections, gaps at the air-handler cabinet. Beyond that, technicians use:
- Theatrical fog / smoke: pumped into the pressurized duct system, smoke exits at every leak point — fast and dramatic for locating major gaps
- Pressure-pan correlation: identifies which specific registers connect to runs leaking to outdoors, without requiring full duct access
- Infrared imaging: useful during heating or cooling operation to spot temperature anomalies at walls and ceilings where ducts run through unconditioned cavities
Durable sealing materials
- Mastic (duct sealant): the gold standard for metal-to-metal and metal-to-flex connections. Brushed on, it stays flexible, doesn’t crack with thermal cycling, and lasts decades.
- UL 181-listed foil tape: appropriate for rigid sheet-metal connections when applied correctly. Requires clean, dry surfaces.
- Butyl/foil tape: good for flex-duct collar connections and register boots.
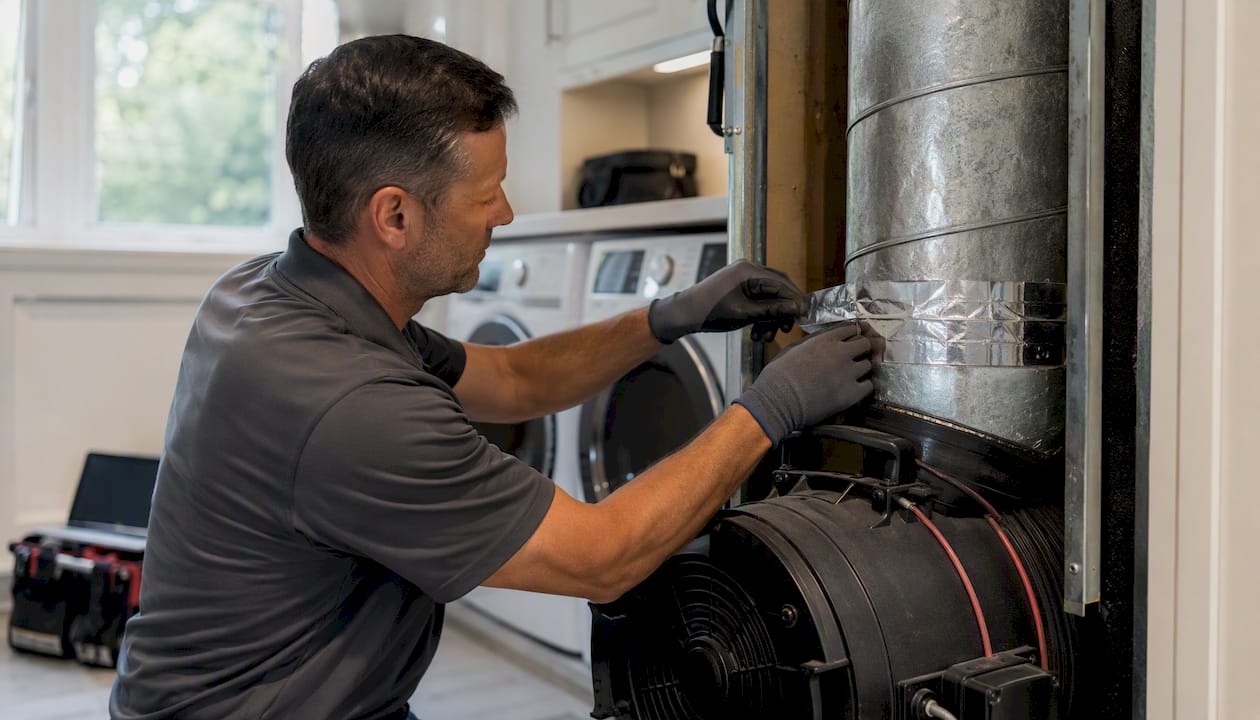
- Cloth-backed “duct tape”: avoid it entirely. It dries out, loses adhesion within a few years, and fails at exactly the joints you most need sealed. For more on effective sealing methods, the material choice matters as much as the application.
Repair sequencing
Fix the air-handler cabinet and supply plenum first — leaks there affect every cubic foot of air the system moves. Then address branch-run connections and flex-duct collars. Register boots come last; they’re accessible and often leaky, but their individual contribution is smaller than a gap at the plenum. Opening walls to reach buried duct runs is rarely cost-effective unless the leakage is extreme or a renovation is already planned.
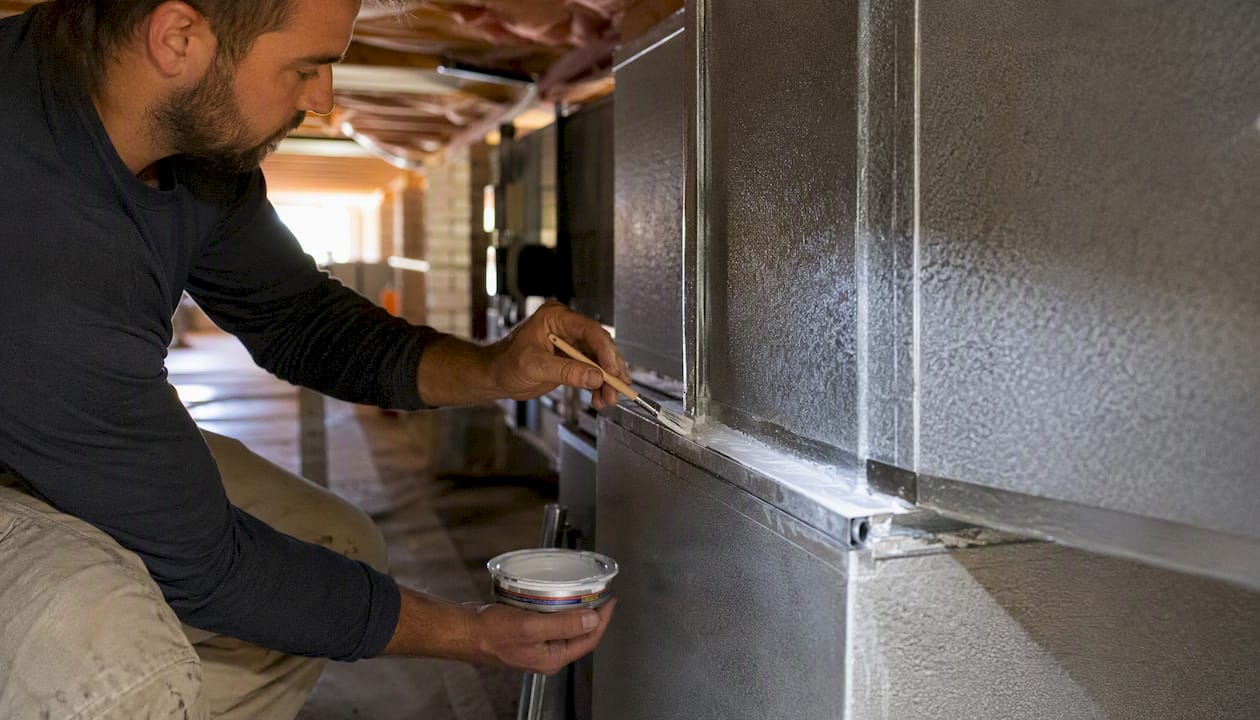
Pro Tip: During testing, temporarily seal registers with painter’s tape and cardboard rather than permanent plugs — it’s faster to remove and less likely to damage register finishes. Consistent sealing of every register is what makes the test pressure stable and the CFM25 reading reliable.
What to expect when Trucomfortaz performs your duct test and repair
A Trucomfortaz service visit follows a clear, documented workflow so you know exactly what you’re getting before and after.
On-site workflow:
- Arrival and visual inspection of accessible ductwork, air-handler cabinet, and register boots
- Setup of the duct blaster fan (Minneapolis Duct Blaster or Retrotec) at the air handler or return plenum
- Blower door setup when LTO testing is requested
- Pressurization/depressurization sequence with real-time manometer readings
- Diagnostic leak location using smoke, pressure-pan, or visual methods
- Written sealing plan with prioritized repair list and cost estimate
- Optional before/after retest to confirm that sealing achieved the target CFM25
Deliverables you receive:
- Signed test report stating test pressure (25 Pa), measured CFM25, conditioned floor area used for normalization, and whether the result is total leakage or LTO
- Repair recommendations ranked by energy impact
- Cost estimate for sealing or, where sealing isn’t sufficient, duct repair or replacement options
- Documentation suitable for building-department compliance, ENERGY STAR certification, or real-estate disclosure
Trucomfortaz technicians carry NATE certification, which means the person running your test understands the full HVAC system context — not just the duct numbers in isolation. That matters when a high CFM25 result turns out to be driven by a disconnected return rather than distributed micro-leaks, because the repair strategy is completely different. The signed report meets the documentation requirements that inspectors commonly require for code compliance.
The case for testing before you replace equipment
Most homeowners schedule a duct leakage test only when a building inspector requires one. That’s leaving money on the table. The highest-return scenarios for testing are the ones nobody mandates: ducts running through an unconditioned attic in a Phoenix-area home, a new air conditioner being dropped onto a duct system that hasn’t been inspected in fifteen years, or persistent hot rooms that three thermostat adjustments haven’t fixed.
A new high-efficiency system installed on a leaky duct network will never perform at its rated efficiency. The equipment gets blamed for comfort problems that are actually a duct problem. Testing before installation gives you a real baseline; testing after sealing confirms the fix worked. That sequence — test, seal, retest — is the only way to know the number actually moved.
The single most underestimated scenario is a home preparing for sale. A documented CFM25 result below code threshold is a concrete, verifiable selling point in a market where buyers are increasingly asking about energy performance. It costs a few hundred dollars and takes a few hours. The alternative is a buyer’s inspector flagging unknown duct condition and the negotiation that follows.
Tru Comfort’s duct testing and repair service in New River, AZ
Tru Comfort’s duct testing service gives you a concrete CFM25 number, a signed report, and a clear repair plan — not a vague recommendation to “consider sealing.” For homeowners in New River, Anthem, and the surrounding Phoenix area, that means one visit covers the test, the diagnosis, and the estimate, with a before/after retest available to confirm results.

Scheduling is straightforward: call the office, use the online contact form, or request emergency service if a comfort problem is urgent. The technician arrives with calibrated equipment, completes the test in two to three hours, and leaves you with documentation you can hand to a building inspector, a real estate agent, or an ENERGY STAR verifier. If the results point toward replacement rather than sealing, Trucomfortaz can walk you through duct repair and installation options and the associated ductwork costs so you make the decision with real numbers in hand.
Sources
These are the primary references cited in this guide. Each covers a distinct aspect of duct leakage testing.
- Total duct leakage tests (BASC/PNNL)
- Duct Leakage Testing: Why It Matters and How to Fix Leaky Ducts (2026) | HVAC Base
- Guide to Duct Leakage Testing | BCAP
- Duct Systems Must Be Sealed and Tested for Leakage | Jaspector