Thermostat Placement Problems: Compare Readings for 15 Minutes
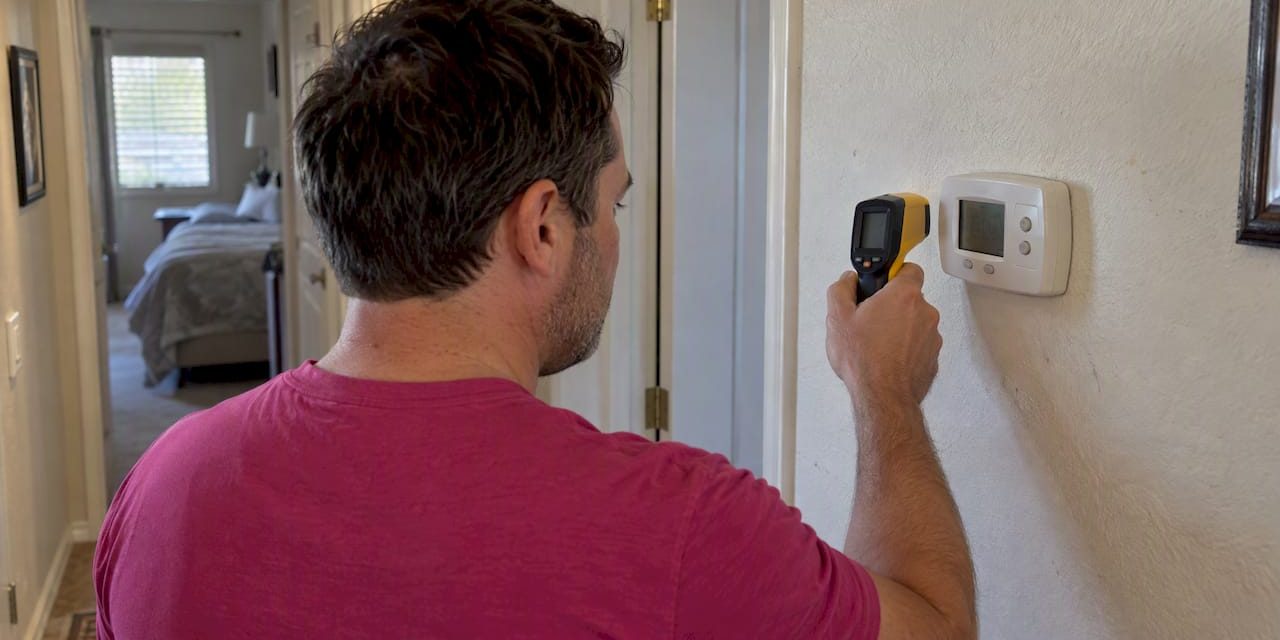
If your thermostat sits near a sunny window, a supply vent, an exterior wall, or behind a couch, placement is probably skewing your readings. The fastest way to confirm it: hold a calibrated thermometer at breathing height next to the thermostat for 15 minutes and compare the two numbers. A gap of more than one or two degrees points to placement, while a thermostat that ignores an extreme setpoint change points to a wiring or control problem that calls for a NATE-certified technician.
TL;DR:
- Mount the thermostat on an interior wall, 3 to 6 feet above the floor, in a central, occupied area with open airflow.
- Sunlight, vents, appliances, exterior walls, and blocked spaces bias readings; multistory homes may need remote sensors or zoning for uneven temperatures.
- Trial the proposed location with a portable or wireless sensor for 24 to 48 hours before relocating, and cut HVAC power before handling wires.
- Persistent room imbalances or short cycling despite accurate readings point to airflow or zoning faults; ask a NATE certified technician to assess pressure and airflow.
Table of Contents
- Where should a thermostat go for an accurate reading?
- Where not to install a thermostat if you want reliable readings
- Quick tests and measurements you can run in under 90 minutes
- When moving the thermostat helps and when it’s only a symptom
- How to safely test and relocate a thermostat yourself
- Field perspective from Tru Comfort technicians
- How we help when a thermostat move isn’t enough
- FAQ
- Sources
Where should a thermostat go for an accurate reading?
The best spot is an interior wall in a room you actually spend time in, mounted 3 to 6 feet above the floor. That height range matches the breathing zone, the area where people sit and stand, and the EPA’s siting guidance for sensors confirms it captures the temperature people actually feel rather than a reading skewed by floor-level cold or ceiling-level heat.
Central placement matters almost as much as height. A thermostat tucked in a rarely used room, or in whichever room happens to run hottest or coldest, reports a temperature that doesn’t match the rest of the house. A few placement habits keep readings honest:
- Choose a central hallway or living area that reflects the home’s general temperature, not an outlier room.
- Keep at least a few feet of open space around the unit so air can move freely across the sensor.
- Avoid single-story assumptions in multi-story homes, since upstairs and downstairs rarely sit at the same temperature.
The EPA notes that free airflow around a sensor reduces noisy or skewed readings, while blockages and nearby heat sources bias them. Homes with heavy solar gain or multiple stories often need more than one sensing point, which is where remote sensors or zoning start to make sense instead of relying on a single central thermostat.
Where not to install a thermostat if you want reliable readings
Certain spots almost guarantee a skewed reading, and each one pushes the HVAC system to work against itself in a different way.
- Direct sunlight warms the thermostat’s internal sensor directly, so the system shuts off heating or runs cooling long after the room has reached a comfortable temperature.
- Next to supply or return registers exposes the sensor to conditioned air straight from the duct, which triggers the system to cycle off before the rest of the room catches up.
- Near kitchens, fireplaces, or other heat-producing appliances feeds the thermostat artificial warmth that has nothing to do with the room’s actual comfort level.
- Inside bookcases, behind furniture, or in unused hallways traps stagnant air around the sensor and disconnects the reading from where people actually live.
- On exterior walls or near drafty doors and windows exposes the thermostat to outdoor temperature swings that have little to do with indoor comfort.
DOE guidance lists these same conditions as common causes of inaccurate sensing, short-cycling, and uneven comfort between rooms.
Quick tests and measurements you can run in under 90 minutes
Before assuming you need a new thermostat location or a service call, run these checks:
- Place a calibrated room thermometer at breathing height within a foot of the thermostat and let both sit for 15 to 20 minutes before comparing readings.
- Run the extreme-set test: push the setpoint several degrees past the current room temperature and confirm the system responds within a few minutes, since DOE guidance treats this as a basic functional check for control and wiring issues.
- Take three or four spot readings in other rooms at the same height and time to spot stratification or a room that consistently runs hotter or colder than the thermostat’s location.
- Write down each reading with the time and location so you can see whether the pattern tracks sun exposure, vent proximity, or something else.
Pro Tip: Run your spot checks in the afternoon when solar gain and appliance heat are at their peak, since that’s when placement problems show up most clearly.
A thermostat that matches your handheld thermometer but still won’t satisfy, or one that never responds to the extreme-set test, usually points to a wiring issue rather than placement. If that happens, simple fixes for a thermostat that won’t reach its setpoint are worth checking before anything else.
When moving the thermostat helps and when it’s only a symptom
Relocating a thermostat fixes the problem when the cause is localized: direct sun hitting the unit for part of the day, radiant heat from a nearby appliance, or a sensor blocked by furniture. In those cases, a biased reading was making the system cycle too often or shut off too soon, which both wastes energy and wears down components faster than necessary.
Relocation won’t help when the underlying issue is airflow, not sensing. Watch for these signs that point to a system-level problem instead:
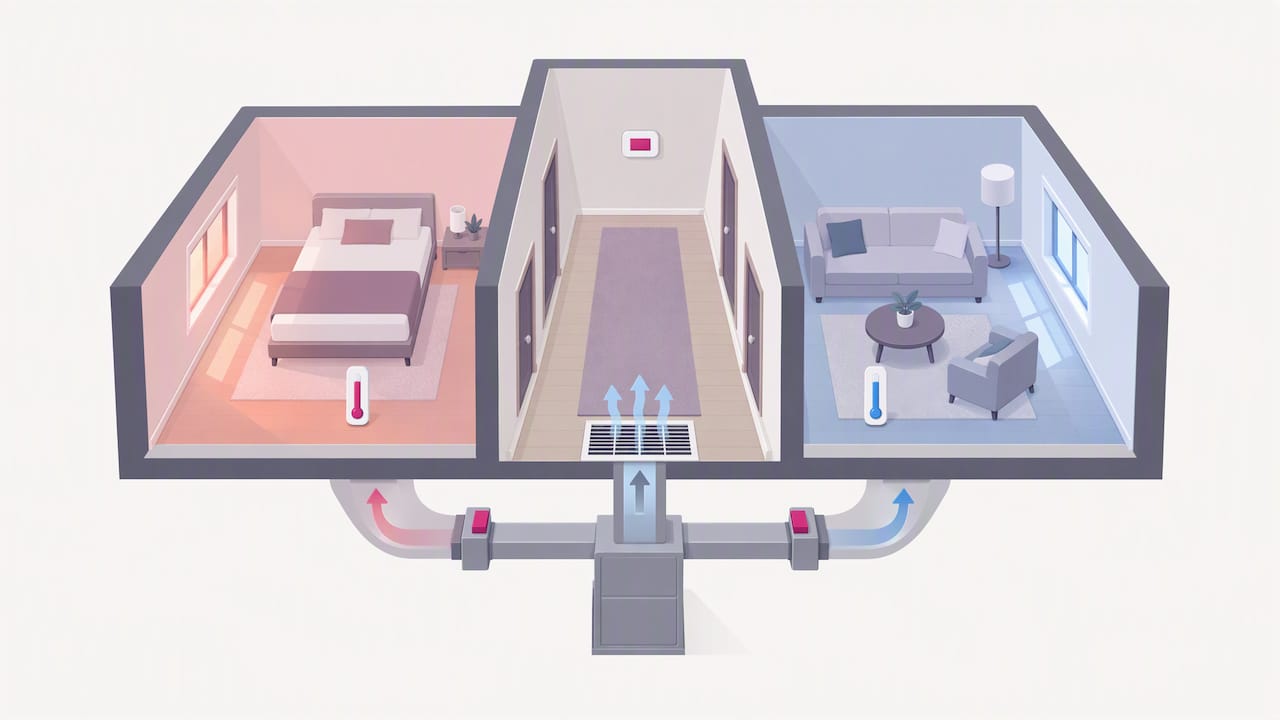
- Rooms stay uneven in temperature no matter where the thermostat sits, which often means duct imbalance rather than placement.
- The system short-cycles even after you’ve confirmed the thermostat matches a calibrated thermometer.
- One floor of a two-story home never reaches the setpoint while the other overshoots it, a sign of stack effect or missing zoning.
- Energy bills stay high despite a corrected thermostat location, suggesting duct leakage or incorrectly sized equipment.
A NATE-certified technician checks static pressure, airflow at the registers, thermostat calibration offset, and whether the home would benefit from zoning before recommending any permanent changes.
How to safely test and relocate a thermostat yourself
If your checks point to placement, test a new spot before committing to it.
- Turn off power to the HVAC system at the breaker before touching any wiring.
- Photograph the existing wiring and label each wire with its terminal letter so reconnection is straightforward.
- Use a portable thermometer or a wireless remote sensor in the candidate location for 24 to 48 hours to confirm it reads differently from the current spot.
- If the new spot checks out, patch the old wall opening and route wiring to the new location, calling an electrician or HVAC technician if the run crosses a stud bay or requires new low-voltage wiring.
- Consider a remote sensor or multi-zone control instead of a single relocation when no single spot represents the whole house, such as in split-level homes or rooms with heavy solar gain.
Pro Tip: A 24 to 48 hour trial with a portable sensor costs nothing and prevents a wall patch job in the wrong spot.
If spot checks reveal consistent imbalance between rooms rather than one bad thermostat location, checks for return air problems or a zoning diagnostic are the next logical step.
Field perspective from Tru Comfort technicians
Our NATE-certified technicians start every placement call with measurement, not guesswork. The most common error we see is a thermostat mounted on an exterior wall that gets afternoon sun, and a simple breathing-height comparison usually confirms it in minutes rather than requiring a relocation. We offer maintenance plans that include diagnostic visits for homeowners who want that measurement done by a professional.
How we help when a thermostat move isn’t enough
When your own checks point to airflow, zoning, or equipment sizing rather than a bad thermostat spot, we bring the diagnostic tools to settle it: static pressure testing, airflow measurement at each register, and a real assessment of whether your home needs zoning instead of a single thermostat. Our technicians provide service recommendations based on measurements rather than sales incentives. We are dedicated to fixing the actual problem effectively the first time.

If your home needs a new thermostat location, added zoning, or a full airflow diagnostic, our air conditioner installation and repair services cover the cooling side, and our Tru Comfort Advantage maintenance plans include the diagnostic visits that catch these issues before they show up on your energy bill. Reach out and we’ll get a technician out to measure, not guess.
FAQ
Where not to place a thermostat?
Avoid exterior walls, direct sunlight, supply or return registers, kitchens, fireplaces, and spots behind furniture or inside enclosed hallways. Each of these exposes the sensor to a temperature that doesn’t match the rest of the room, which DOE guidance ties directly to short-cycling and uneven comfort.
What are the signs that my house thermostat is bad?
Common signs include a blank or unresponsive display, a system that doesn’t react to the extreme-set test, rooms that never reach the setpoint, and frequent short-cycling. If the display itself is the issue, quick fixes for a blank thermostat screen cover the most common causes.
Is it best to leave the thermostat at one temperature?
A programmable thermostat used to set back temperatures during sleep or long absences typically saves energy compared to leaving it at one constant setting, according to ENERGY STAR guidance. How much you save depends on your climate, schedule, and how far you set it back.
How do I tell if my thermostat is accurate?
Hold a calibrated room thermometer at breathing height next to the thermostat for 15 to 20 minutes, then compare the two readings. A difference of more than a degree or two suggests placement bias rather than a true system problem, and ASHRAE research notes that comfort depends on more than air temperature alone, including radiant heat and air movement.
Sources
- A Guide to Siting and Installing Air Sensors | US EPA
- A Guide to Energy-Efficient Heating and Cooling (ENERGY STAR)