Homeowners: 5 Evaporator Coil Leak Symptoms to Show Your HVAC Tech
The clearest signs of an evaporator coil leak are weak or lukewarm air from the vents, long cooling cycles that never quite reach the thermostat setpoint, and water pooling in the drip pan alongside hissing or ice on the indoor coil. If you see water or ice, turn the system off, take a few photos, and call a qualified HVAC technician rather than waiting it out.
TL;DR:
- If water enters the home, ice forms on the coil, or oily residue appears near refrigerant lines, turn the system off and document the damage.
- Replace a dirty air filter and record system age, model number, run times, thermostat setting, and symptom start date before the technician arrives.
- Technicians should verify airflow, temperature split, superheat, and subcooling alongside leak detection, since low airflow or coil fouling can mimic refrigerant loss.
- A small, accessible leak at one joint may be patched, but widespread coil corrosion or repeat refrigerant loss usually favors replacement over repeated repairs.
- Change the air filter every one to three months, keep the condensate drain clear, and schedule annual maintenance to reduce fouling and corrosion.
Table of Contents
- Symptoms homeowners can observe
- Common causes of evaporator coil leaks
- What homeowners should do right now
- How professionals diagnose and repair evaporator coil leaks
- How Tru Comfort approaches diagnosis and verification
- Prevention and routine maintenance to reduce leak risk
- A straight answer on refrigerant leaks
- Get your coil checked before a small leak gets expensive
- FAQ
- Sources
Symptoms homeowners can observe
Before calling anyone, it helps to know what you are looking and listening for. A failing evaporator coil rarely announces itself with one obvious sign. It usually shows up as a cluster of smaller clues that get worse over days or weeks.
Start with airflow checks for duct leaks. Hold your hand near a supply vent while the system runs. Air that feels barely cool, rather than cold, often points to a refrigerant problem rather than a fan issue. Pair that with run time: if the system cycles for far longer than usual or never satisfies the thermostat, something in the cooling circuit is likely struggling.
Water tells its own story. A low refrigerant charge can change how condensate forms and drains, which sometimes shows up as a wet drip pan, a stain on the ceiling below an attic air handler, or dampness inside the cabinet. Oily residue near coil connections is another clue, since refrigerant oil tends to leave a slick film where a leak has been slowly weeping.
- Feel supply air at a vent and compare it to how cold it normally runs.
- Note cycle length and whether the house ever reaches the set temperature.
- Check the drip pan and surrounding area for standing water or stains.
- Look and listen for hissing near refrigerant lines or fittings.
- Check for frost or ice buildup on the visible parts of the indoor coil.
A quick filter check and a visual look into the cabinet are safe for most homeowners. Opening refrigerant lines or adding refrigerant is not: that work requires specialized tools and EPA Section 608 certification. If your system shows weak airflow along with these other signs, our guide to diagnosing an AC that is not blowing cold air walks through the related troubleshooting steps.
Common causes of evaporator coil leaks
Evaporator coils are built from thin copper or aluminum tubing, and that thinness is exactly why leaks develop over time rather than all at once. A few mechanisms show up again and again in failed coils.
- Corrosion from airborne chemicals or moisture slowly thins the tubing wall until it pits through.
- Fouling from dirt, dust, or biological growth restricts airflow across the coil, which can lead to freezing and physical damage to the fins and tubing.
- Mechanical stress or an installation defect, such as a poorly supported line set, creates a weak point that eventually cracks.
- Brazed joints and connections are common failure points because they take more thermal stress than the surrounding tubing.
A pinhole leak at a joint rarely stays small. Refrigerant loss changes pressure and temperature in the circuit, which stresses the rest of the system and tends to make the original leak worse over time rather than stable. Fouling in particular deserves attention, since a Building America measure guide found that a dirty evaporator coil reduces airflow, can cause icing and compressor damage, and can mimic the same capacity loss as a refrigerant leak.
What homeowners should do right now
If you see water inside the home, ice on the coil, or an oily residue near the lines, shut the system off at the thermostat before anything else. Running a frozen or leaking system tends to turn a repair into a bigger one.
- Turn off the system if you see water intrusion, ice, or visible oil.
- Collect condensate water if it is pooling near flooring or ceilings.
- Check and replace a dirty air filter, since restricted airflow mimics some leak symptoms.
- Photograph the drip pan, any stains, and the coil area for your records.
- Note run times, the thermostat setpoint, and when symptoms started.
- Call a qualified HVAC technician rather than attempting refrigerant work yourself.
Pro Tip: Write down your system’s age, model number if visible, and any recent repair work before the technician arrives. It speeds up diagnosis and gives you a more accurate estimate.
Do not attempt to top off refrigerant on your own. Our refrigerant leak guide covers how to document symptoms safely while you wait for service.
How professionals diagnose and repair evaporator coil leaks
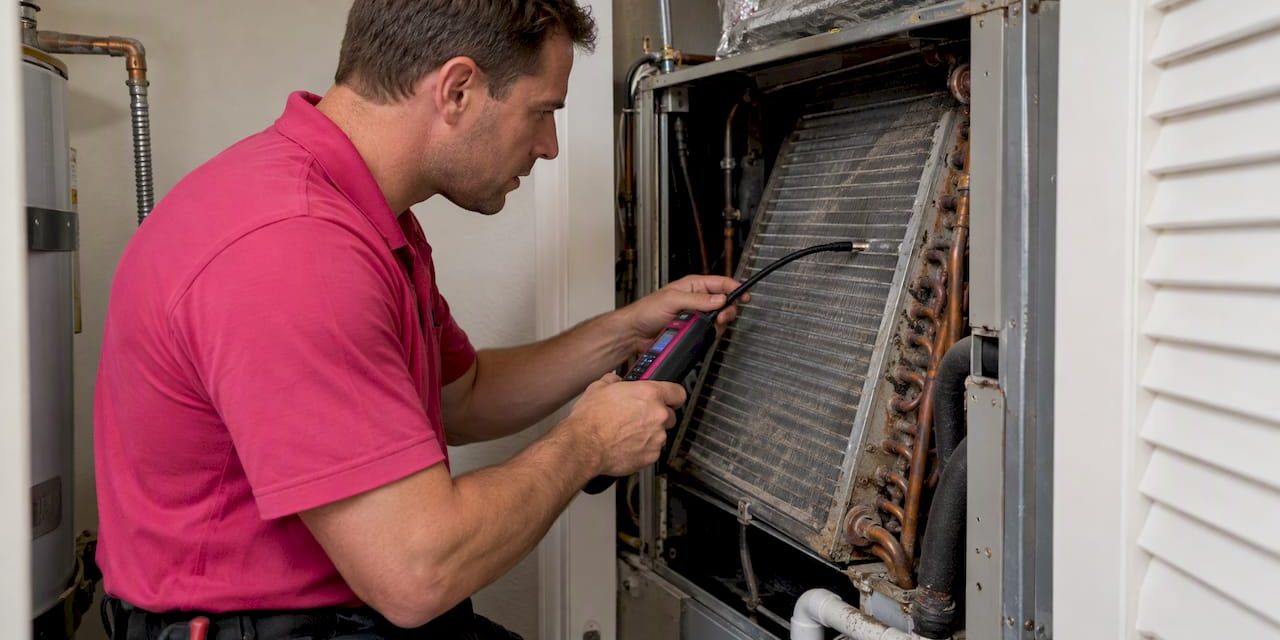
A technician’s job is to find the leak, confirm what else might be wrong, and recommend a fix that actually holds. That starts with leak-location tools rather than guesswork.
- Ultrasonic detectors pick up the high-frequency sound of escaping refrigerant.
- Electronic leak detectors sample air near suspected points for refrigerant traces.
- Bubble testing applies a soapy solution to joints and watches for bubbles forming.
- Gas-imaging cameras make refrigerant visible on screen, which helps on coils with multiple suspect areas.
Finding the leak is only half the job. A technician also checks airflow, measures the temperature split between return and supply air, and verifies superheat and subcooling readings. According to DOE guidance on airflow and refrigerant charge verification, this sequence separates airflow or coil fouling problems from an actual refrigerant undercharge, which prevents a misdiagnosis that leads to the wrong repair.
Patching a leak at a joint sometimes works for a small, accessible leak, but a coil with corrosion spread across multiple areas usually keeps leaking elsewhere, which is why replacement is often the more durable recommendation. Any of this work, including evacuation, recovery, and recharging, requires EPA Section 608 certification, and it is reasonable to ask a technician how they located the leak and what verification testing they performed afterward.
How Tru Comfort approaches diagnosis and verification
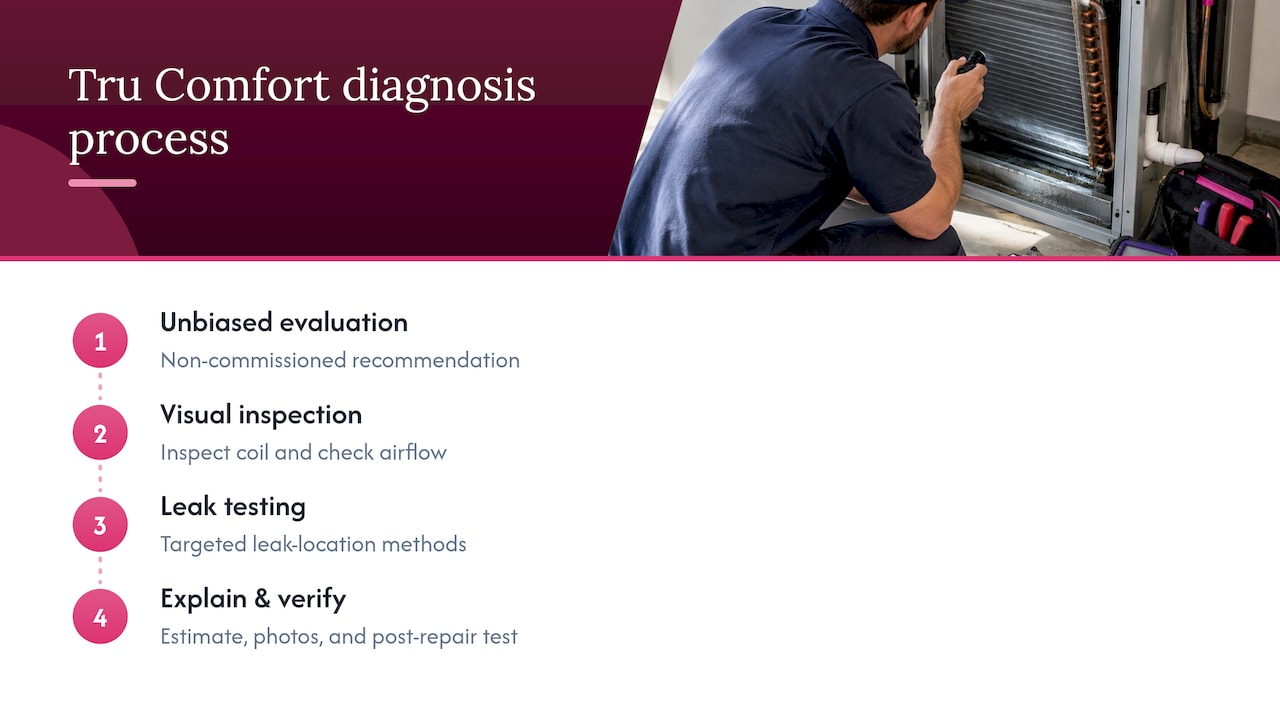
Our technicians work on a non-commissioned basis, so a repair or coil replacement recommendation reflects what your system actually needs. A typical visit starts with a visual inspection and airflow checks, moves into targeted leak-location testing, and ends with a written explanation of repair versus replacement options along with verification testing once work is complete. You should walk away with photos of what was found, a written estimate, and confirmation that the fix actually holds before the job is closed out.
Prevention and routine maintenance to reduce leak risk
Most of what protects a coil from leaking is routine upkeep rather than anything dramatic. Dirty coils trap heat and moisture against the metal, which accelerates the corrosion that eventually causes pinhole leaks.
- Clean the condenser and check the indoor coil for buildup on a regular schedule.
- Replace the air filter every one to three months to keep airflow steady across the coil.
- Keep the condensate drain clear so water does not back up into the cabinet.
- Schedule an annual professional tune-up to catch early corrosion or fouling.
Our coil-cleaning guide covers the steps you can handle yourself, and our AC maintenance checklist lays out the rest of the seasonal routine. If a coil has visible corrosion or keeps losing refrigerant despite repairs, proactive replacement is usually the more cost-effective path than repeated service calls.
A straight answer on refrigerant leaks
Topping off refrigerant without fixing the leak is one of the most common mistakes I see homeowners talked into, and it almost always costs more in the long run than the repair would have. A frozen coil that keeps running does not heal itself: it just spreads damage to the compressor and other parts.
What actually reduces callbacks is simple: a technician who shows you where the leak is, explains the repair options in writing, and verifies the fix with real testing before leaving.
Get your coil checked before a small leak gets expensive
If you are seeing any of the signs above, weak airflow, water where it shouldn’t be, hissing, or ice on the coil, it is advisable to contact a technician to find the actual cause instead of guessing. Our visits include inspection, leak-location testing, a written estimate covering repair or coil replacement, and verification testing once the work is done.

- AC repair and refrigerant leak diagnosis for systems with weak or failing cooling.
- Coil replacement when patching is not a durable fix.
- Emergency service for water intrusion or a fully iced system.
- Maintenance plans to catch early coil wear before it becomes a leak.
Reach out through our air conditioner repair and maintenance page to get a visit scheduled.
FAQ
Can a leaking evaporator coil be fixed?
A small, accessible leak at a single joint can sometimes be patched and recharged, but EPA guidance notes that simply topping off refrigerant without repairing the leak tends to lead to repeat service and higher operating costs. When corrosion has spread across the coil, replacement is usually the more reliable fix.
How much does it cost to replace a leaking evaporator coil?
Pricing depends on coil size, system age, and labor in your area, so it is best confirmed with a written estimate from a technician who has inspected your system. We provide pricing after a visit through our air conditioner services page.
What is the average lifespan of an AC evaporator coil?
Evaporator coils are generally designed to last as long as the rest of the air conditioning system, though corrosion, fouling, or installation issues can shorten that significantly. Regular cleaning and filter changes help the coil reach its expected service life.
Where is the most common place for an AC leak to occur?
Leaks most often start at brazed joints and fittings, since these connections face more thermal stress than the surrounding tubing. Corrosion also tends to concentrate wherever moisture and airborne chemicals sit against the coil fins longest.
Sources
- Section 608 technician certification requirements | EPA
- Air conditioner diagnostics, maintenance, and replacement | Building America (DOE)
- Energy