Avoid an $80–$250 Pro Visit: 8 Steps to Clean Coils for Homeowners
Yes, in most cases you can clean condenser coils yourself if the buildup is light to moderate. Shut off power at the thermostat and the outdoor disconnect first, then clear debris and rinse from the inside out with a garden hose or foaming coil cleaner, never a pressure washer, and straighten any bent fins with a fin comb. If you spot oily residue, corrosion, frost near the refrigerant lines, or heavy grease matting, stop and call a NATE-certified technician instead.
TL;DR:
- Homeowners should inspect outdoor coils every three to six months if their environment involves dust, salt air, or debris, and clean thoroughly at least once annually.
- Using gentle tools like a garden hose, fin comb, and coil cleaner while the unit is powered off helps prevent damage and ensures effective cleaning.
- Rinse coils from inside out and avoid pressure washers or acid-based cleaners to protect aluminum fins and electrical components.
- Signs of dirty coils include longer run times, higher bills, warm rooms despite system operation, and ice formation on indoor coils.
- Contact a professional if there’s oily residue, corrosion, persistent warm air, or heavy grease buildup, with typical service costs ranging from $80 to $250.
Table of Contents
- When Should You Clean Your AC Condenser Coils?
- What Tools and Cleaners Do You Need?
- How Do You Clean Condenser Coils Step by Step?
- What Safety Precautions Should You Follow?
- When Should You Call an HVAC Pro Instead?
- How Can You Keep Coils Cleaner for Longer?
- Why This Advice Reflects Industry Standards
- What Homeowners Get Wrong About Coil Cleaning
- Get Professional Coil Cleaning and AC Maintenance
- Sources
- FAQ
When Should You Clean Your AC Condenser Coils?
Plan on cleaning condenser coils once a year, ideally in early spring before cooling season ramps up. If your home sits near a dusty construction zone, gravel road, or the coast, check the unit every three to six months instead, since salt air and fine dust clog fins faster than typical suburban grime.
You don’t need to pull panels to know something’s wrong. Watch for these signs:
- Fins look matted, gray, or coated in a felt-like layer of dust
- Grass clippings, cottonwood fluff, or leaves are packed against the coil
- The system runs longer than it used to, or your electric bill jumps for no obvious reason
- Rooms stay warm even though the thermostat says the AC is running
- Ice forms on the indoor evaporator coil, which often signals restricted airflow starting outside
Dirty condenser coil symptoms tend to show up gradually, which is exactly why annual inspection matters more than waiting for a breakdown.
What Tools and Cleaners Do You Need?
Gather everything before you shut off power so you’re not hunting for a screwdriver mid-job. The core kit is simple:
- Garden hose with a spray or rain nozzle setting (not a jet)
- Fin comb sized to your coil’s fin spacing
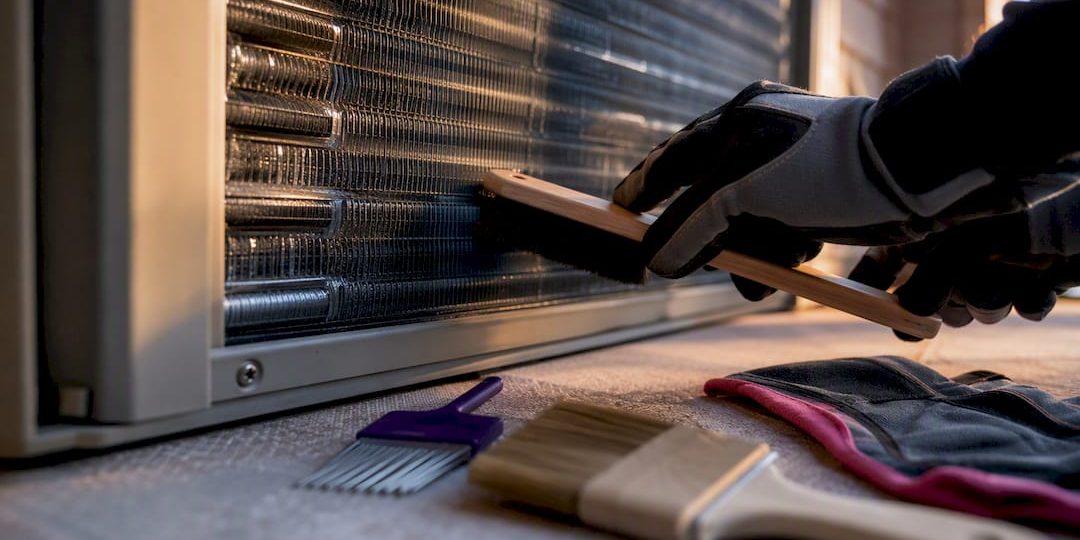
- Soft-bristle brush for loosening surface dirt
- Screwdriver for panel screws
- Work gloves and safety glasses
- Coil cleaner appropriate to the buildup
For light dust, a no-rinse foaming coil cleaner works fine and saves a step. For grease, pollen glue, or years of neglect, a rinse-off alkaline cleaner cuts through it, but skip anything acid-based since acid pits and discolors aluminum fins over time.
Statistic Callout: A typical DIY coil cleaning session runs 45 to 90 minutes and costs about $25 to $60 in supplies, and the fin comb, brush, and gloves are reusable for years, so your real annual cost drops fast after the first cleaning.
How Do You Clean Condenser Coils Step by Step?
This is the part that actually determines whether your cleaning helps or hurts the unit. Rush it, and you risk bent fins, water in the electrical box, or a coil that looks clean but still runs hot.
- Kill the power completely. Turn the thermostat off, then flip the outdoor disconnect switch next to the unit. If it has a lockout tab, lock it. Wait a couple of minutes for any residual charge to clear before touching anything.
- Clear the area first. Remove leaves, grass clippings, and bugs by hand from the top and sides of the unit. A soft brush handles the loose dirt that’s just resting on the fins, not embedded.
- Decide on panel removal. If your unit’s top panel comes off easily with a screwdriver, take it off. That lets you rinse inside-out, which is the technique EnergySense recommends because it pushes trapped debris back out the way it came in rather than driving it deeper into the fins. If the panel is sealed or you’re not confident removing it, a careful outside-to-inside rinse through the grille still helps.
- Apply cleaner. Spray foaming or rinse-off cleaner evenly across the fins, following the product’s dwell time, usually 5 to 15 minutes, so it can break down grime before you rinse.
- Rinse gently. Use a spray or rain setting and hold the nozzle 6 to 12 inches from the fins. Work top to bottom in slow, even passes. Gentle, inside-out rinsing improves cooling capacity and thermal efficiency far better than a strong, direct blast that flattens fins.
- Comb bent fins carefully. Run the fin comb along the direction the fins naturally sit, using light pressure. If more than a small section is crushed or torn, stop. Fin combs fix light bending, not structural damage.
- Reassemble and dry. Put panels back on, then let the coil air dry for 15 to 30 minutes before restoring power.
- Test the system. Turn the disconnect back on, then the thermostat. Confirm the outdoor fan spins, listen for unusual noise, and check that cool air is reaching the vents within 10 to 15 minutes.
Pro Tip: Rinse in the early morning or evening when the unit isn’t running hard. Cleaning a coil that’s still warm from an afternoon of cycling can cause thermal shock on some fin coatings, and it’s just more pleasant work when it’s not 100 degrees outside.
What Safety Precautions Should You Follow?
Water and electricity make a genuinely dangerous combination, so the disconnect step is not optional. Confirm the outdoor switch is fully off before you spray anything, and keep water away from the electrical panel, capacitor, and wiring compartment throughout the job.
- Wear gloves; coil fins are thin metal and can slice skin easily
- Wear eye protection when applying cleaner, since foaming products can drip back
- Never use a pressure washer, even on the low setting; the force bends fins and can drive water into electrical components
- Skip acid-based or highly caustic cleaners on aluminum coils
- Check your owner’s manual before cleaning if your unit is still under warranty
A pressure washer looks efficient, but the psi that strips grime off a driveway is more than enough to flatten aluminum fins in seconds and force water past seals it was never designed to handle. A garden hose on a gentle setting does the job without the risk.
If you’re ever unsure whether a step applies to your specific model, document what you’ve done and consider bringing in a technician rather than guessing.
When Should You Call an HVAC Pro Instead?
Cleaning fixes dust, pollen, grass, and general grime. It does not fix mechanical or electrical problems, and treating a symptom as a cleaning issue can waste time while a real problem gets worse.
Call a professional if you notice:
- Oily residue anywhere near the coil or refrigerant lines, which usually points to a leak
- Visible corrosion, rust, or pitting on the coil fins or cabinet
- The system still blows warm air after a thorough cleaning
- The unit won’t restart, trips a breaker, or makes grinding or clicking noises
- Grease buildup so heavy it feels sticky rather than dusty, or the unit sits on a roof where access is unsafe without proper equipment
A technician visit for coil issues typically runs $80 to $250 and includes diagnostics you can’t do yourself, like refrigerant pressure checks and electrical testing. If your outdoor unit still isn’t cooling properly after cleaning, a homeowner’s guide to AC not blowing cold air walks through the next troubleshooting steps before you call anyone.
How Can You Keep Coils Cleaner for Longer?
A few small habits stretch the time between deep cleanings and cut down on how much scrubbing you’ll do each spring.
- Keep at least 2 feet of clearance around the unit and trim back shrubs or grass that crowd the cabinet
- Mow with the discharge chute pointed away from the condenser, not toward it
- During peak cooling months, a quick hose rinse every 4 to 6 weeks knocks off surface dust before it cakes on
- Replace indoor air filters every 1 to 3 months, since a clogged filter forces the whole system to work harder and pushes more debris toward the outdoor unit over time
- In coastal or high-salt areas, ask about corrosion-resistant coatings or a protective top cover
Pro Tip: If you consistently forget the seasonal rinse, tie it to something you already do regularly, like the day you check smoke detector batteries or change your filter. Piggybacking on an existing habit works better than a standalone reminder.
For a full seasonal breakdown, the HVAC maintenance schedule for homeowners lays out filter timing alongside coil care so you’re not guessing at intervals.
Why This Advice Reflects Industry Standards
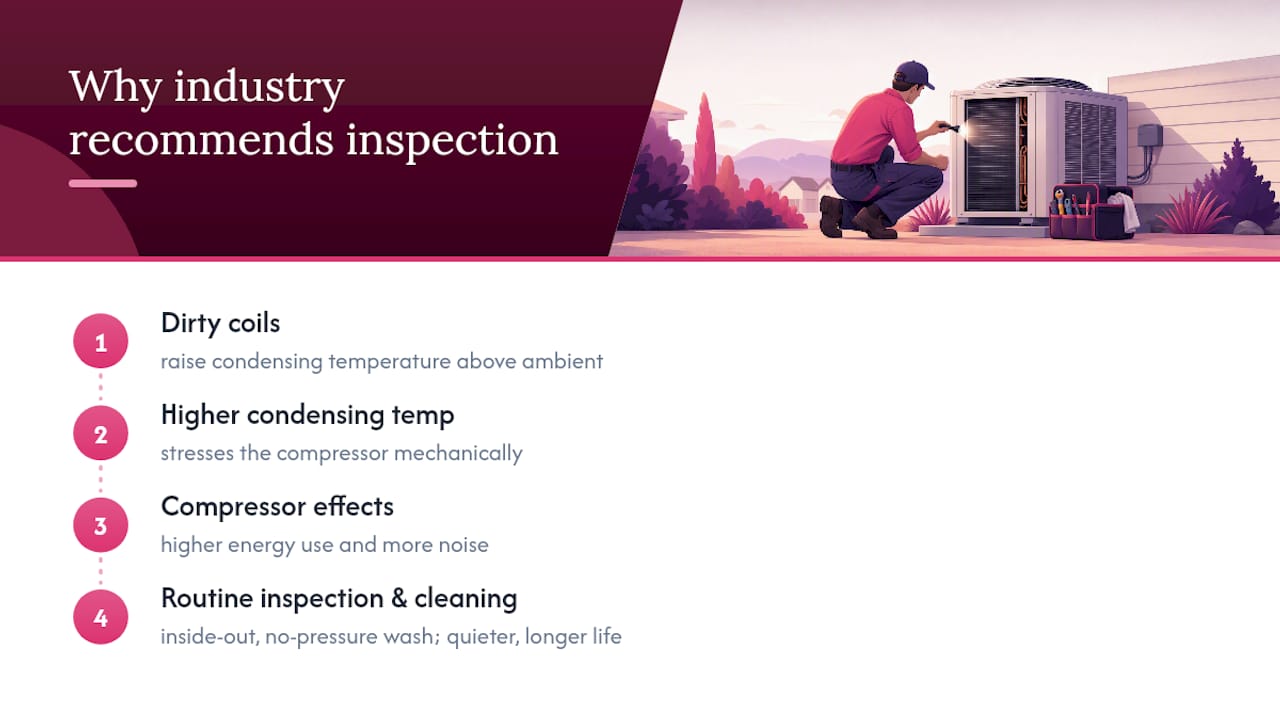
The inside-out rinse and no-pressure-washer rule aren’t opinions. The U.S. Department of Energy recommends routine coil inspection because a dirty coil drives up compressor energy use, and industry guidance built on the NADCA ACR 2006 standard backs annual inspection with professional cleaning for heavy fouling. Dirty coils also raise condensing temperature over ambient, which stresses the compressor, a mechanical detail that explains why a clean coil often means a quieter, longer-lasting system, not just a lower bill. Technicians apply these industry standards on every service call in New River and the surrounding area.
What Homeowners Get Wrong About Coil Cleaning
Most guides treat coil cleaning like a chore you check off once a year and forget. That’s backwards. The condition of your coil is one of the few maintenance items you can actually see the effect of, in your electric bill, within a single billing cycle. A coil caked in cottonwood fluff isn’t just dirty; it’s making your compressor work harder every single time it cycles on, and that wear compounds over a full Arizona summer.
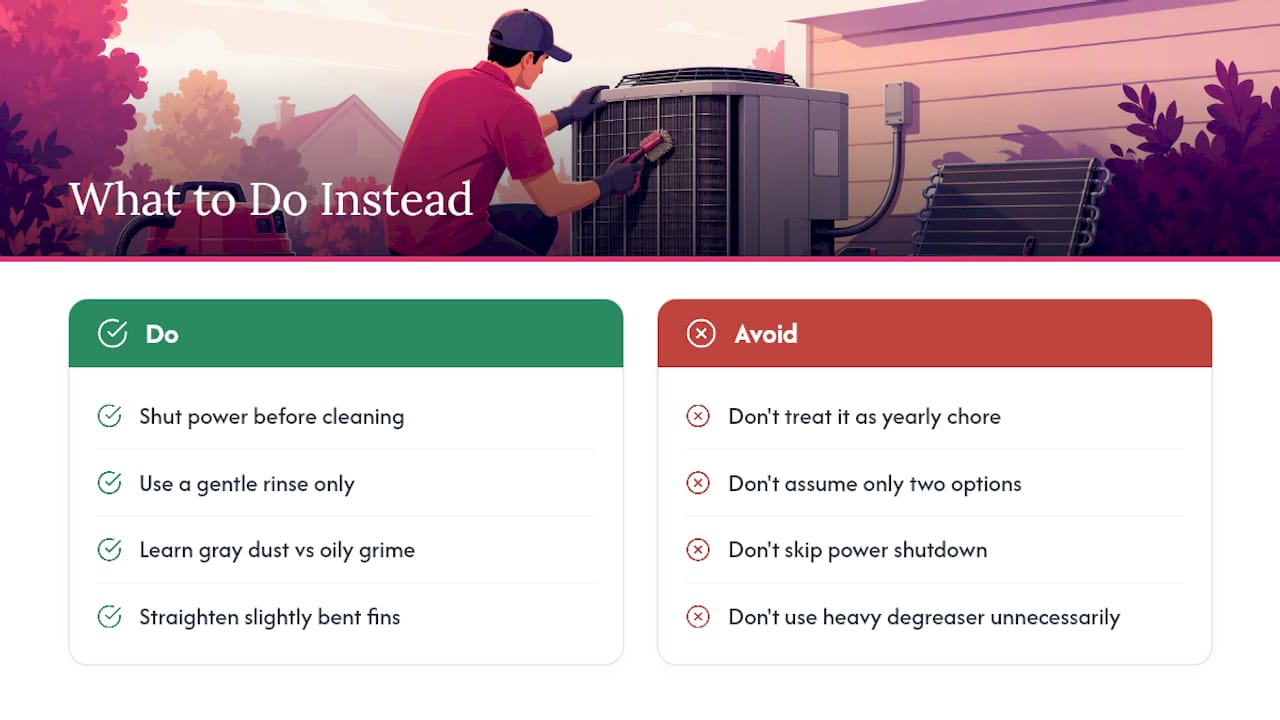
The bigger mistake is treating “I can’t clean it myself” and “I need a full system replacement” as the only two options. There’s a wide middle ground, and it’s where most homeowners actually live: a coil that’s dirty enough to hurt performance but nowhere close to needing professional-grade degreasing. Learning to tell the difference, gray dust versus oily grime, slightly bent fins versus crushed ones, saves you both an unnecessary service call and an unsafe DIY attempt.
If there’s one thing to prioritize, it’s the power shutdown and the gentle rinse. Everything else, cleaner choice, fin comb technique, timing, matters less than getting those two steps right every single time.
Get Professional Coil Cleaning and AC Maintenance
If your coils have crossed from dusty to genuinely fouled, or you’d rather not touch the disconnect yourself, experienced technicians handle it without commission-driven upsells, just an honest look at what your system actually needs.

Heavy grease buildup, suspected refrigerant leaks, corrosion, or a unit still under manufacturer warranty are all situations where a professional visit protects you better than a weekend project. Tru Comfort’s air conditioner maintenance and repair services cover full coil cleaning, diagnostics, and tune-ups for homeowners in New River and nearby communities. For year-round peace of mind, the Tru Comfort Advantage maintenance plan builds regular coil cleaning and inspection into your schedule so you’re not left guessing when the next visit is due. Reach out to schedule an inspection before the next heat wave hits.
Sources
- Cleaning Condensing Units – EnergySense (University of Illinois)
- What should the condensing temperature be? | ACHR News
- How to Clean AC Condenser Coils: Step-by-Step Guide for Homeowners
FAQ
Can You Clean Condenser Coils Yourself?
Yes, for light to moderate dust and debris, a homeowner can safely clean condenser coils with the power off and a gentle garden hose rinse. Heavy grease, corrosion, or suspected refrigerant leaks call for a technician visit, which typically runs $80 to $250.
What Are the Symptoms of a Dirty Condenser Coil?
Common signs include matted or gray-looking fins, longer AC run times, higher electric bills, and rooms that stay warm despite the system running. Ice on the indoor evaporator coil can also point back to airflow trouble that started at a dirty outdoor unit.
Is It Okay to Spray Water on Your Air Conditioner While It’s Running?
No. Always shut the system off at the thermostat and the outdoor disconnect before spraying any water, since running electrical components combined with water create a real shock and short-circuit risk. Wait a few minutes after shutoff before you start rinsing.
How Often Should Condenser Coils Be Cleaned?
Most homes need a full coil cleaning once a year, ideally in spring before peak cooling season. Homes in dusty, windy, or coastal areas should inspect every three to six months and add quick rinses during the hottest months.
What if I Don’t Feel Comfortable Cleaning the Coils Myself?
That’s a completely reasonable call, especially for rooftop units or systems still under warranty. Tru Comfort’s maintenance plans include professional coil cleaning performed by NATE-certified technicians, so you never have to guess whether it was done right.