Why Your Pilot Light Keeps Going Out (and How to Fix It)
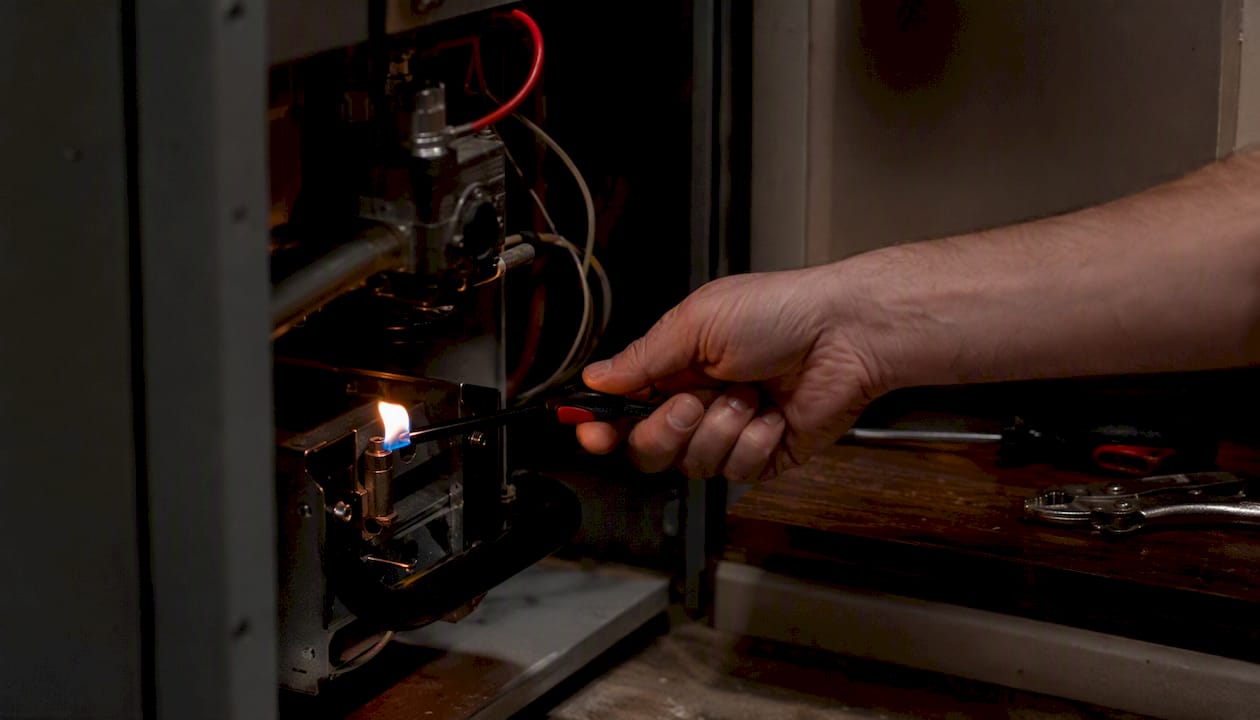
If your pilot light keeps going out, the most likely culprits are a failing thermocouple, a clogged pilot orifice, a draft problem, or a faulty gas control valve. Most of these are diagnosable at home. One is not: if you smell gas, hear hissing, or see soot around the appliance base, stop immediately, get everyone out, and call your gas provider or 911. Don’t relight anything.
For everyone else, here’s the short version: try one careful relight following the steps on your appliance’s nameplate. If the pilot dies again, work through the cause list below before attempting a second try. Two failed relights mean it’s time to diagnose the underlying problem or call a pro.
Safety first, always. Per HVAC Database’s furnace lighting guide: if you detect a gas smell, hear hissing, or notice rust or soot around the furnace base, evacuate immediately and contact emergency services or your gas provider. Never attempt a relight under those conditions.
Quick triage signals:
- Gas smell or hissing: Evacuate now. Do not relight.
- Visible soot or rust around the burner: Call a pro before doing anything else.
- Pilot lights while you hold the knob, then dies when you release it: Classic thermocouple failure. Safe to diagnose.
Key Takeaways
A pilot light that keeps going out almost always traces back to one of four fixable causes: thermocouple failure, a clogged pilot orifice, a draft or venting problem, or a faulty gas control valve.
| Point | Details |
|---|---|
| Safety comes first | Evacuate immediately if you smell gas, hear hissing, or see soot; never relight under those conditions. |
| Thermocouple is the top suspect | If the pilot dies when you release the knob, test or replace the thermocouple before anything else. |
| Hold the knob 30–60 seconds | The thermocouple needs that time to heat up and signal the gas valve to stay open. |
| Two failed relights means stop | After two careful attempts, diagnose the root cause or call a NATE-certified technician. |
| Trucomfortaz covers the full repair | Tru Comfort’s New River, AZ technicians handle diagnostics, thermocouple replacement, vent inspection, and gas valve work. |
Table of Contents
- Why does a pilot light keep going out? The top suspects
- How to relight a furnace or water heater pilot safely
- Cause-by-cause troubleshooting: what to check and when to stop
- How to test a thermocouple with a multimeter
- What repairs typically cost and how long they take
- When to stop DIY and call a professional
- Maintenance habits that reduce pilot failures
- The pattern most homeowners miss
- Tru Comfort is ready to diagnose and fix your pilot problem
- Sources
Why does a pilot light keep going out? The top suspects
According to Bellevue Plumber Pro, the most common reason a water heater pilot won’t stay lit is a failing thermocouple. Furnaces follow the same pattern. Here’s the ranked list of likely causes, with a one-line diagnostic hint for each:
- Thermocouple or thermopile failure/misalignment: Pilot lights while you hold the knob, then dies when released. The thermocouple isn’t generating enough millivolts to hold the gas valve open.
- Dirty or clogged pilot orifice: Flame is weak, yellow, or wanders. The tiny orifice that feeds the pilot is partially blocked.
- Drafts, downdrafts, or backdrafting: Pilot goes out on windy days or when bathroom/kitchen exhaust fans run. Pattern is the tell.
- Low or intermittent gas pressure: Pilot flame is weak and other gas appliances in the home are also underperforming.
- Faulty gas control valve: Pilot lights and holds, but the main burner won’t fire, or the pilot dies despite a clean thermocouple and good flame contact.
- ODS (oxygen depletion sensor) trip on vent-free appliances: The pilot shuts off because oxygen in the room has dropped below a safe threshold. This is a safety feature doing its job, not a malfunction.
Pattern recognition saves time. If pilot outages line up with windy days, running exhaust fans, or other exhaust events, venting and backdrafting should be investigated before you replace any parts.
Pro Tip: Before touching anything, write down when the outages happen. Time of day, weather, which other appliances were running. That log will cut a technician’s diagnostic time in half.
How to relight a furnace or water heater pilot safely
Stop before you start. Sniff for gas and look for soot or hissing sounds. If any of those are present, evacuate and call emergency services — do not proceed with relighting.
If the area is clear, follow these steps:
- Turn the gas control knob to OFF. Wait a full five minutes. This clears any accumulated gas from the combustion chamber. Skipping this wait is the most common DIY mistake.
- Find the pilot assembly. Check your appliance’s nameplate label for the manufacturer’s specific relight instructions. Those instructions override any general guide, including this one.
- Turn the knob to PILOT. Press and hold the knob down. This manually opens the pilot gas supply.
- Ignite the pilot. Use a long-reach lighter or the built-in igniter button. Hold the flame at the pilot opening.
- Keep holding the knob for 30–60 seconds. This is how long the thermocouple needs to heat up enough to signal the gas valve to stay open. Releasing too early is why most first attempts fail.
- Release the knob slowly. Watch the flame. If it stays, turn the knob to ON. If it dies, you have a problem beyond a simple relight.
- Two failed attempts = stop. Move to diagnostics below, or call a technician.
Pro Tip: The 30–60 second hold is non-negotiable. The thermocouple has to reach operating temperature before it can generate the millivolts needed to hold the valve open. Rushing this step is the single most common reason a DIY relight fails even when the thermocouple is fine.
For a detailed visual walkthrough, Tru Comfort’s step-by-step pilot lighting guide covers furnace-specific procedures with safety notes.
Cause-by-cause troubleshooting: what to check and when to stop
Thermocouple problems
The thermocouple is a small metal rod that sits in the pilot flame. When heated, it generates a tiny electrical signal (measured in millivolts) that tells the gas valve to stay open. If it’s dirty, bent out of position, or worn out, the valve closes the moment you release the knob.
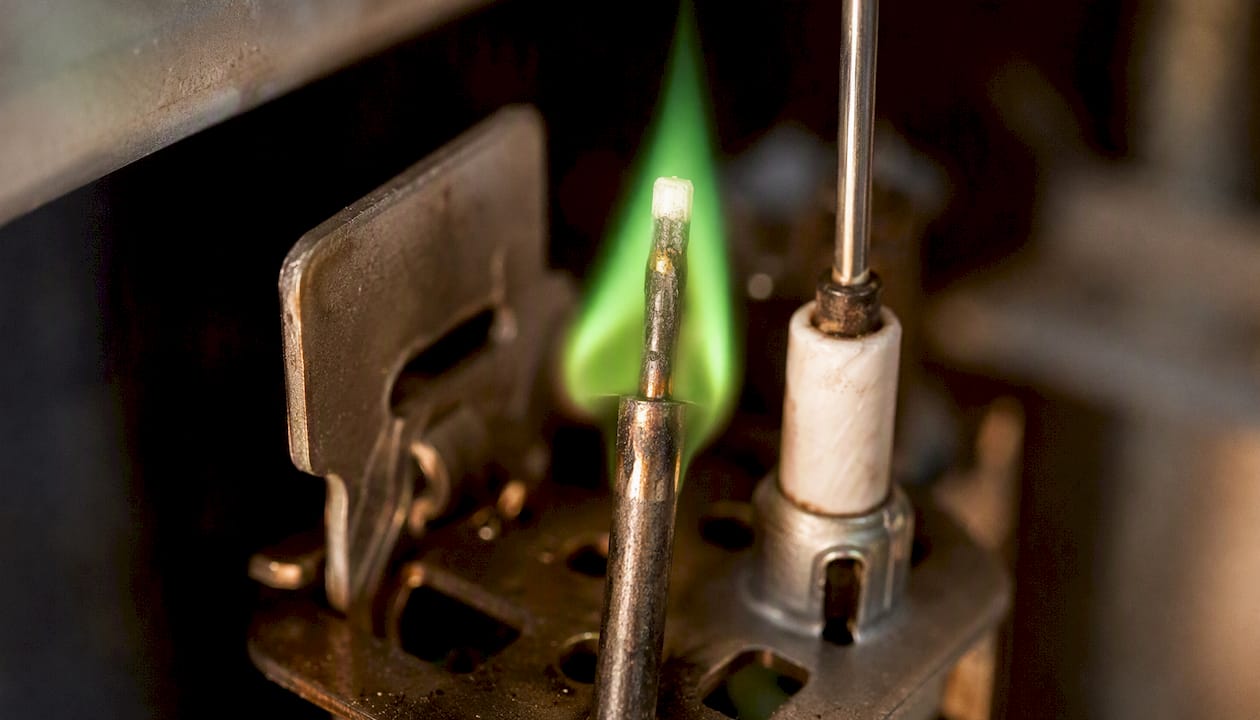
Desatech’s gas valve troubleshooting documentation is specific about flame contact: the pilot should heat the top approximately 7/8" of the thermocouple with a clean blue flame. If the flame is hitting too low, or the pilot hood is coated in soot, the thermocouple won’t produce adequate voltage regardless of its condition.
Safe checks you can do: gently reposition the thermocouple so the tip sits in the hottest part of the flame, and wipe the rod with a soft cloth to remove surface oxidation. If the flame contact looks correct and the pilot still dies on release, the thermocouple likely needs replacement.
Pilot orifice and pilot tube clogs
The pilot orifice is a tiny opening, and it doesn’t take much to partially block it. Dust, mineral deposits, and debris can reduce gas flow enough to produce a weak or wandering yellow flame that can’t properly heat the thermocouple.
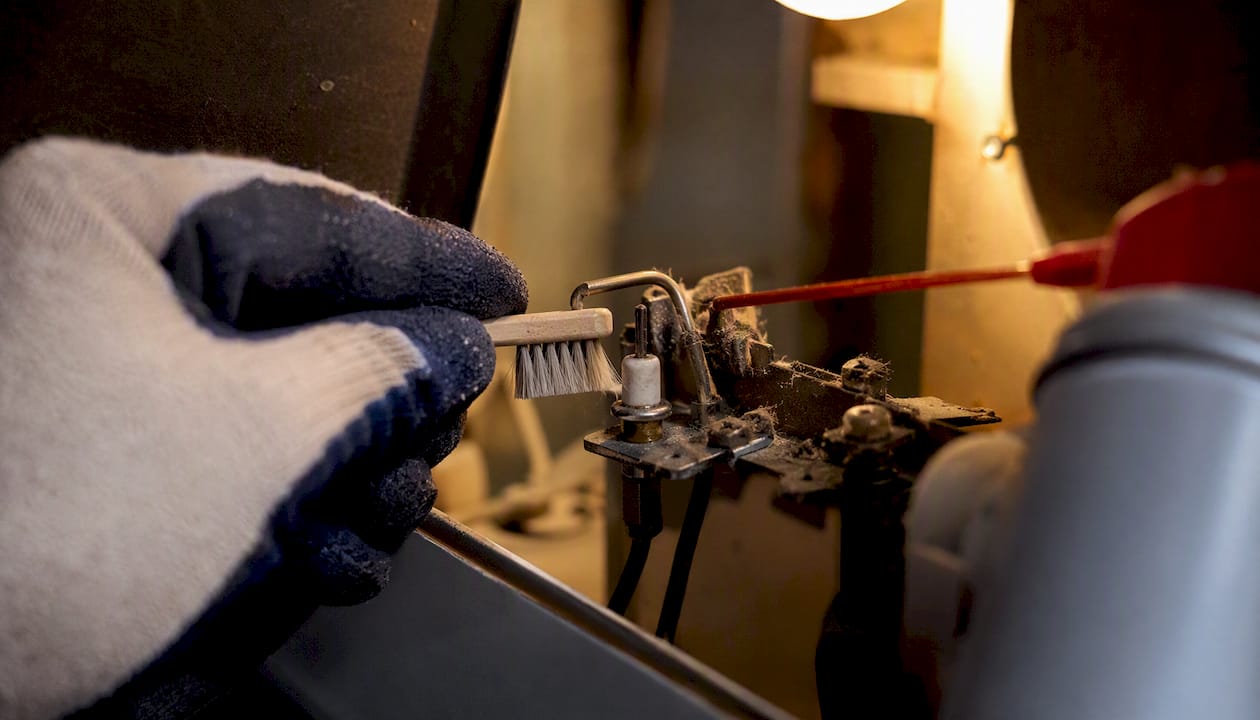
AC Service Tech’s pilot light guide makes an important point: cleaning the pilot area and confirming the thermocouple tip is enveloped by a clean blue flame often resolves weak-pilot issues. But the orifice must never be poked or widened. Use compressed air or a soft brush around the assembly. Inserting anything into the orifice opening risks enlarging it, which changes the gas-to-air ratio and creates a new problem.
Drafts and venting/backdrafting
A pilot flame is small. It doesn’t take much airflow to blow it out. If your outages track with windy days, running exhaust fans, or opening/closing exterior doors, the cause is almost certainly a draft or a venting problem.
Trudeau Metre’s troubleshooting guide notes that downdrafts, venting failures, and changes in home airflow are common causes of pilot flame extinction, and they’re safety concerns that typically require professional vent inspection. Visible soot around the draft hood or melted plastic near the vent connector are signs that combustion gases are spilling back into the living space. Stop using the appliance and call a pro.
Gas pressure and supply issues
If the pilot flame is consistently weak and other gas appliances in the home are also underperforming, the problem may be upstream: low line pressure, a failing regulator, or a partially closed shutoff valve. You can check that the manual shutoff near the appliance is fully open. Beyond that, gas pressure adjustments require a manometer and a licensed technician. Don’t touch the regulator.
Gas control valve and electronics
If the thermocouple tests good, the flame contact is correct, and the pilot still won’t hold, the gas control valve itself may be failing. Plumbing Pros SD notes that a pilot staying lit while the main burner refuses to fire points more toward a gas control or thermopile problem than a thermocouple issue. Gas valve replacement is professional work.
ODS trips on vent-free appliances
Vent-free heaters and fireplaces use an oxygen depletion sensor that shuts the pilot off when room oxygen drops below a safe level. If this is happening frequently, the room may need better ventilation, or the ODS itself may need cleaning or replacement. Either way, don’t disable or bypass the sensor.
Diagnostic shortcut: If the pilot lights and holds while you press the knob but dies the moment you release it, the thermocouple is the first thing to test. If the pilot stays lit but the burner won’t fire, the gas control valve or thermopile is the more likely fault.
| Symptom | Likely cause | Safe first check | When to stop |
|---|---|---|---|
| Pilot dies when knob released | Thermocouple failure or misalignment | Reposition tip in flame; clean rod | Call pro if problem persists after cleaning |
| Weak or yellow pilot flame | Clogged pilot orifice | Blow compressed air around assembly | Don’t poke orifice; call pro if flame stays weak |
| Pilot blows out on windy days | Draft or backdrafting | Check for open windows/fans | Call pro if soot or melted components visible |
| All gas appliances underperforming | Low gas pressure | Check manual shutoff is fully open | Don’t adjust regulator; call gas company |
| Pilot holds but burner won’t fire | Gas control valve or thermopile | Confirm thermocouple reads good | Gas valve replacement requires a pro |
| Pilot trips on vent-free unit | ODS activation | Improve room ventilation | Call pro if ODS trips in well-ventilated space |
How to test a thermocouple with a multimeter
A basic millivolt test tells you whether the thermocouple is generating enough voltage to hold the gas valve open. You’ll need a digital multimeter, a small wrench, a soft cloth, and optionally fine sandpaper for light surface cleaning.
- Light the pilot and let it run for two minutes. The thermocouple needs to reach operating temperature before you measure.
- Set your multimeter to DC millivolts (mV). Most meters have a 200mV or 2000mV range; use the lower one.
- Locate the thermocouple connection at the gas valve. This is the small threaded fitting where the thermocouple rod connects to the valve body.
- Touch the red probe to the thermocouple lead and the black probe to the valve body (ground). Keep the pilot lit while you measure.
- Read the output. A healthy thermocouple in an open-circuit test typically reads in the range of 25–30 millivolts. HVAC Optimizer’s thermocouple troubleshooting guide notes that values below certain millivolt thresholds indicate the thermocouple isn’t producing enough voltage to hold the gas valve open. A reading well below the expected range, or one that fluctuates erratically, points to replacement.
- Disconnect and inspect the connection. Look for corrosion or loose threads at the valve fitting.
Pro Tip: When reinstalling or replacing a thermocouple, InspectApedia’s pilot repair guide flags a common pitfall: cross-threading the connector at the gas valve. Always finger-tighten the fitting first to confirm correct thread alignment before using a wrench. A cross-threaded valve fitting can turn a $15 thermocouple swap into a gas valve replacement.
Tools checklist:
- Digital multimeter (DC millivolt range)
- Small adjustable wrench or nut driver
- Soft cloth for cleaning the thermocouple rod
- Fine sandpaper (optional, for light oxidation)
- Long-reach lighter for relighting after the test
Multimeter test limitations: A single static reading doesn’t catch intermittent failures. A thermocouple that reads fine when cold but drops out under sustained heat, or one that produces adequate open-circuit voltage but can’t hold the valve under load, requires a loaded millivolt test that most homeowners can’t safely perform. If the static test looks normal but the pilot keeps dying, that’s a pro call.
What repairs typically cost and how long they take
Thermocouple replacement is one of the least expensive HVAC repairs you’ll encounter. Parts run roughly $5–$20 at any hardware store, and a technician can usually complete the swap in under an hour. Total cost with labor typically falls in the $75–$150 range depending on your area and the appliance’s accessibility.
Gas valve replacement is a different story. The valve itself can cost $100–$300 or more depending on the appliance brand and model, and labor adds another $100–$200 on top of that. When a gas valve fails on an older unit, it’s worth having a conversation about whether repair or replacement makes more economic sense. Tru Comfort’s repair-vs-replace guide walks through the decision factors in detail.
Pilot orifice cleaning, when done during a service visit, is usually included in the diagnostic fee or adds minimal cost. Vent repairs vary widely based on what’s wrong and how accessible the vent run is.
Time estimates:
- Thermocouple replacement: 30–60 minutes
- Pilot orifice cleaning and adjustment: 30–45 minutes (often done alongside thermocouple work)
- Gas valve replacement: 1–3 hours, plus potential parts lead time if the valve isn’t in stock
- Vent inspection and repair: Varies; a simple inspection takes 30–60 minutes, but repairs can extend the visit significantly
A few factors that push costs higher: LP (propane) appliances often have different parts than natural gas units; hard-to-access units in tight utility closets take longer; and older appliances may require discontinued parts with longer lead times.
When vetting service quotes, look for:
- Licensed and insured technicians
- NATE certification (the industry’s recognized competency standard)
- A written estimate that separates parts from labor
- Clear explanation of what was found and what was replaced
When to stop DIY and call a professional
Some pilot problems are genuinely beyond safe homeowner repair. The line isn’t about mechanical skill. It’s about having the right tools and the safety training to use them. HVAC Database’s furnace guide puts it plainly: persistent failures need specialized diagnostics, and attempting to bypass safety systems is dangerous.
Call a pro immediately if you observe any of these:
- Gas smell anywhere near the appliance
- Hissing sounds from the gas line or valve
- Soot deposits around the burner, draft hood, or vent connector
- Pilot goes out during burner ignition (not just on release of the knob)
- Yellow flame that persists after cleaning
- Signs of backdrafting (soot staining above the draft hood, melted components)
- Carbon monoxide detector alarm
Call a pro after two careful relights if the pilot won’t hold and you can’t identify a clear cause.
What the technician will do:
- Pressure check with a manometer to confirm gas supply pressure is within spec.
- Combustion analysis to assess burner efficiency and identify incomplete combustion.
- Leak detection using electronic sniffers or soapy water on connections.
- Thermocouple loaded millivolt test under operating conditions.
- Vent inspection for blockages, damage, or improper slope.
- Gas valve and control diagnostics to confirm whether the valve is holding correctly.
Pro Tip: Before the technician arrives, write down the appliance’s make, model, and age (check the nameplate), a description of when outages happen, how many times you’ve relighted it, and whether other gas appliances are affected. That information cuts diagnostic time and helps the tech bring the right parts.
Service visits typically include a diagnostic fee, which varies by market but often runs $75–$150. Many companies apply that fee toward the repair if you proceed. Ask upfront.
For common furnace repairs in New River and Phoenix, Tru Comfort’s technicians carry common thermocouple and valve parts on the truck, which reduces the back-and-forth on parts availability.
Maintenance habits that reduce pilot failures
Most pilot problems don’t appear overnight. They develop over months of dust accumulation, gradual thermocouple wear, and slow venting degradation. A few consistent habits keep those issues from becoming emergency calls.
Annual inspection items to cover:
- Pilot assembly and thermocouple: Clean the thermocouple rod and confirm the pilot flame is blue and properly positioned.
- Venting and draft hood: Look for soot, rust, or debris. Confirm the vent connector is secure and properly sloped.
- Gas connections: Check visible fittings for corrosion. Don’t use tools on connections unless you’re qualified.
- Combustion chamber: Look for soot buildup or signs of incomplete combustion.
- Thermostat and controls: Test that the system cycles on and off correctly.
In Arizona, dust is a real factor. The July dust season in the Phoenix metro and New River area pushes fine particulate into utility spaces and can accelerate pilot orifice clogging. Keeping the area around the appliance clear and checking the pilot assembly after major dust events is a practical local habit.
Utility work in your area can also introduce air into gas lines, which causes temporary pilot instability. If your pilot goes out shortly after a gas company crew has been working in the neighborhood, air in the line is a likely cause. It usually clears after a few relight attempts.
Pro Tip: Sign up for an annual maintenance plan with NATE-certified technicians. A trained eye catches slow-developing vent degradation and thermocouple wear before they cause a mid-winter outage. Tru Comfort’s furnace maintenance checklist covers what a thorough annual visit should include.
Small actions that add up: keep the area around the appliance clear of storage and debris, replace furnace filters on schedule (restricted airflow affects combustion), and note any pattern changes in how the pilot behaves across seasons.
The pattern most homeowners miss
Repeated pilot outages almost always have a single root cause. In the field, the most common pattern is a thermocouple that’s been slowly degrading for months, producing just enough millivolts to hold the valve on warm days but failing when temperatures drop and the appliance cycles more frequently. Homeowners relight it, it holds for a few days, then it goes out again. The fix isn’t another relight. It’s a $15 thermocouple and 45 minutes of work.
The second most common pattern is a venting problem that gets blamed on the thermocouple. The pilot blows out, the thermocouple gets replaced, and the problem comes back two weeks later because the real cause was a partially blocked vent or a backdraft condition that no one looked at. That’s why the diagnostic table above matters: matching the symptom to the cause before ordering parts saves money and repeat service calls.
What I’d tell any homeowner: if you’ve relighted the pilot more than twice in a single heating season, something is wrong that a relight won’t fix. Get it diagnosed. The cost of a diagnostic visit is almost always less than the cost of a second service call after a misdiagnosed repair.
Tru Comfort is ready to diagnose and fix your pilot problem
When the pilot keeps going out and a careful relight hasn’t solved it, you need a technician with the right tools, not another YouTube video. Trucomfortaz serves New River, AZ and the surrounding Phoenix area with NATE-certified technicians who carry common thermocouple and valve parts on every truck.

The service covers everything this guide describes: diagnostic pressure checks, thermocouple testing and replacement, pilot orifice cleaning, vent inspection, and gas valve replacement when needed. Because Tru Comfort’s technicians work on non-commissioned pay, the advice you get reflects what your system actually needs, not what generates the largest ticket. Emergency service is available when the heat goes out at the wrong time.
To schedule a diagnostic visit or learn about Tru Comfort’s maintenance plans, have your appliance’s make, model, age, and a description of the symptoms ready. You can also browse the full range of HVAC services to see what’s covered. Book online or call directly.
Sources
The troubleshooting steps and safety guidance in this guide draw from the following authoritative references:
Key references used in this guide:
- How to light a furnace pilot light — HVAC Database: safety-first relight procedure and evacuation guidance
- Gas valves with ODS pilots, thermocouples and thermopiles — Desatech techDocs: thermocouple flame contact specifications and valve diagnostics
- Why won’t my water heater pilot light stay lit? — Bellevue Plumber Pro: cause hierarchy for water heater pilots
- How the gas pilot light functions and 10 reasons why it goes out — AC Service Tech: pilot orifice cleaning and flame diagnostics
- Pilot light keeps going out: common causes and safe troubleshooting — Trudeau Metre: draft and venting pattern diagnostics
- Gas pilot light repair — InspectApedia: thermocouple replacement technique and cross-threading caution
- How to light a furnace pilot light — HVAC Database
- Gas valves with ods pilots, thermocouples and thermopiles — Desatech techDocs
- Why won’t my water heater pilot light stay lit? — Bellevue Plumber Pro
- Pilot Light Keeps Going Out: Common Causes and Safe Troubleshooting — Trudeau Metre
- Gas pilot light repair — InspectApedia