Relighting a furnace pilot light is quite an easy process for homeowners. Use our simple, step-by-step guide below to do this yourself!
What Is The Purpose Of A Pilot Light?
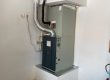
A staple of older furnace models, pilot lights, are in place to serve as a manual ignition source. Starting in about 2010, modern furnaces began to transition to electronic ignition systems. This includes the use of intermittent pilot lights and hot surface igniters. These eliminate the need for a continuously burning flame while enhancing efficiency, at the same time.
The pilot light is a small, burning flame serving as the furnace main burner’s ignition source. When the main burner is activated, the thermostat will tell the gas valve to open. This allows a larger flow of gas to ultimately reach the main burner.
The pilot light is constantly lit, meaning at any time it can ignite the increased gas flow. This will initiate the combustion process and produce the desired heat.
How To Light A Pilot On A Furnace
Make sure to always follow the manufacturer’s instructions specific to your furnace model when attempting to relight the pilot light.
Here are a few general steps to follow when relighting a furnace pilot light.
Step 1. Turn Off Gas
- Always make safety your number one priority with this task.
- Ensure the gas valve is turned off.
- The gas valve is generally located near the furnace, featuring a lever that can be turned to the “OFF” position.
- If you smell a gas leak or believe there may be a leak, immediately evacuate the premises and call the HVAC professionals.
Step 2. Find The Pilot Light
- It’s time to locate your pilot light once the gas is turned completely off.
- Typically, the pilot light will be situated near the bottom of the unit.
- There should be a small access panel featuring instructions or a pilot symbol.
- By removing the panel, you will see the pilot light assembly.
Step 3. Let The Gas Dissipate
- Allow any residual gas to dissipate for a couple minutes.
- This is essential for safety purposes in order to prevent gas buildup when relighting the pilot.
Step 4. Set The Pilot Control Knob
- After the waiting period, it’s time to turn the pilot control knob to the “PILOT” position.
- Press and hold down the knob, at this time.
- This allows gas to flow to the light.
Step 5. Light The Pilot Light
- While holding the knob down, use the matchstick or long lighter to ignite your pilot light at the end of the tube.
- Keep holding the knob for another 30 seconds, ensuring the light remains lit.
- Once 30 seconds has passed, release the knob.
- The light should remain lit, but if it doesn’t, try repeating this process.
Step 6. Turn The Knob To “ON”
- Once the light is burning steadily and consistently, turn the pilot control knob to the “ON” position.
- This allows the flow of gas to the main burner.
- Your furnace should now be operational.
Conclusion
In the event you run into some issues doing this task, you can try a few troubleshooting tips. They include making sure the gas supply is on, verifying the pilot orifice is clean and clear, as well as checking for any drafts that could potentially blow the pilot light out.
For more information, feel free to reach out to the HVAC professionals at Tru Comfort Heating & Cooling today!
Tru Comfort Heating & Cooling In The Phoenix Valley
At Tru Comfort Heating & Cooling, we deliver reliable, efficient, and cost-effective solutions to enhance comfort and water quality. Whether you need HVAC installation, repair, maintenance, or water treatment solutions, our team is here to assist you every step of the way.
Contact us today for exceptional service from an insured and bonded HVAC company. Experience reliable and efficient solutions that exceed your expectations.