Sweating Ductwork: How to Stop Condensation and Mold
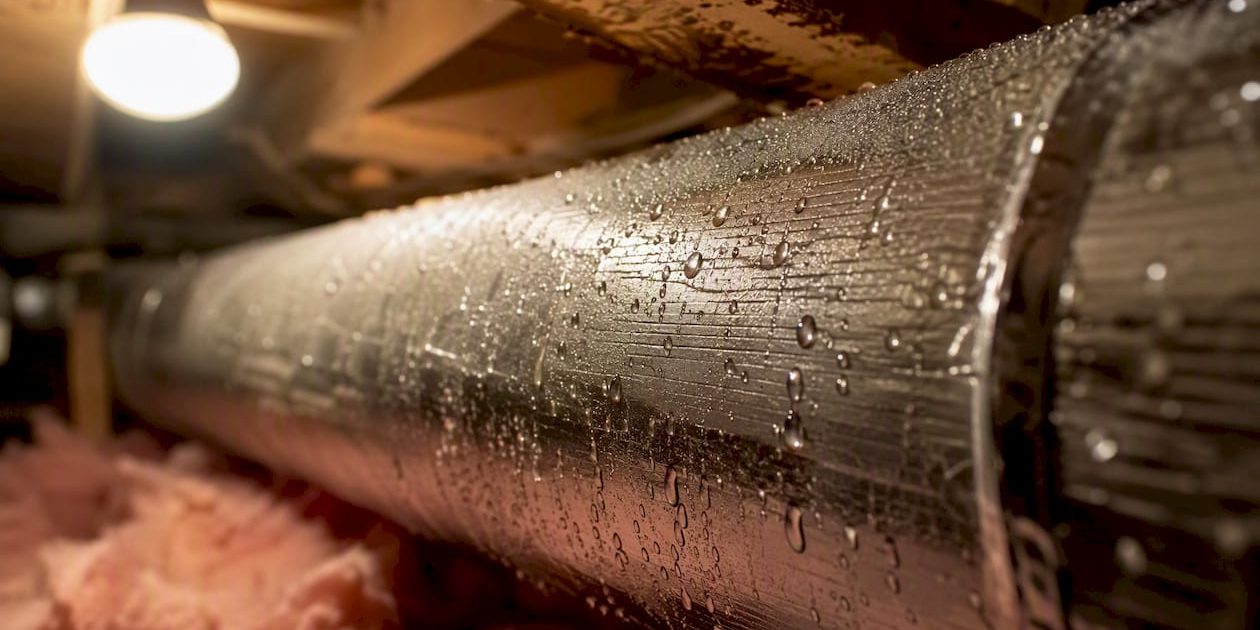
Sweating ductwork is condensation forming on a duct’s surface because that surface has dropped below the surrounding air’s dew point, and the fix starts the moment you notice it. Cold metal or thinly insulated flex duct meets warm, moisture-laden air, and water beads on the outside just like it does on a glass of iced tea in July. Left alone, that water soaks insulation, rusts metal, and feeds mold. Handled fast, it is usually a solvable problem.
Do these things today, in this order:
- Check your air filter and replace it if it is dirty. Restricted airflow makes coils and downstream duct sections run colder than they should.
- Look at every supply register and return grille for beading, drips, or dark staining, and dry any standing water you find with a towel.
- Measure indoor humidity with a basic hygrometer. Anything consistently above 55 percent indoors is pushing your ducts toward the dew point.
- Set your thermostat fan to “auto,” not “on,” so moist air isn’t cycling across cold coils and ducts around the clock.
- If you can safely see an exposed cold duct run in a garage or utility space, wrap it temporarily with foil-faced insulation, not bare plastic.
Pro Tip: Skip the loose plastic sheeting or garbage bags people sometimes tape around a sweating duct. Plastic traps moisture against the metal instead of blocking it, and you end up with hidden rust and mold growing where you can’t see it.
Key Takeaways
Sweating ductwork stops for good only when you fix both the humidity source and any air leaks in the duct system, not just the visible moisture.
| Point | Details |
|---|---|
| Do this now | Change the filter, check registers for moisture, measure indoor humidity, and dry and photograph any standing water. |
| Do this within the week | Run a dehumidifier, clear the condensate drain, and wrap any exposed cold duct sections with foil-faced insulation. |
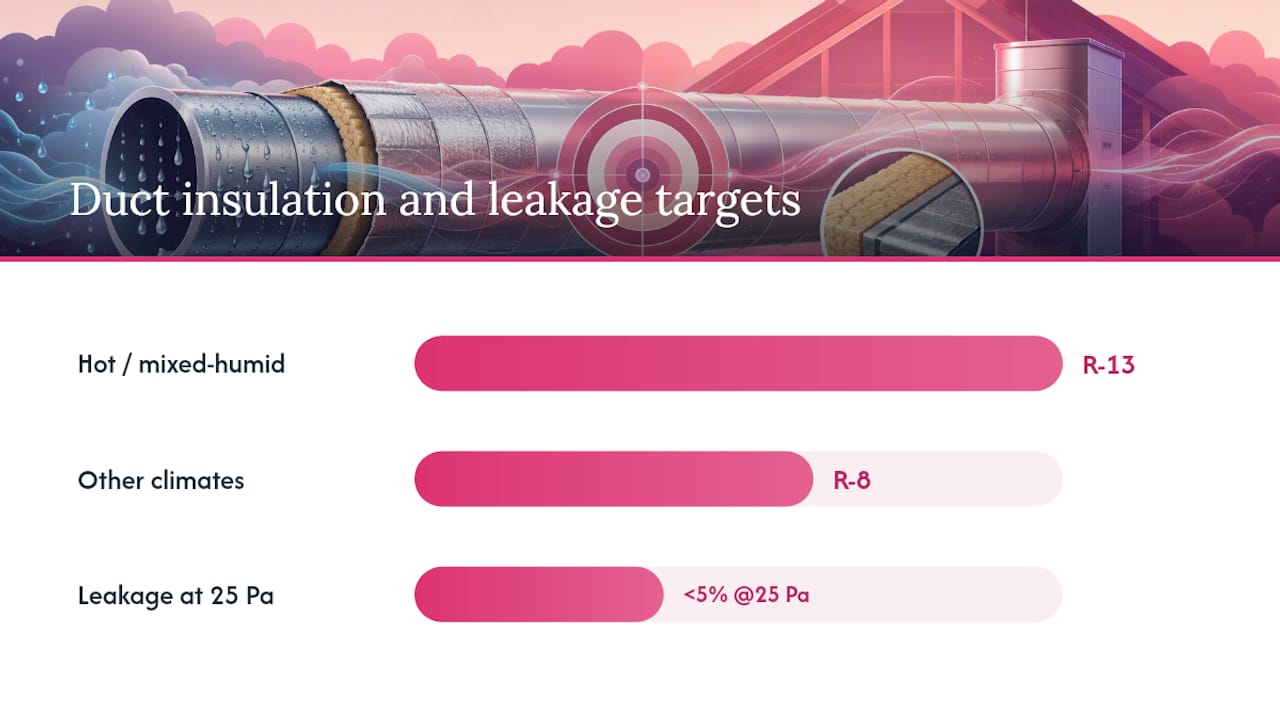
| Know the real targets | Building science points to R-13 insulation in hot or mixed-humid climates (R-8 elsewhere) with duct leakage under 5% at 25 Pa. |
| Call a professional when | You see mold, recurring drips, rusted or collapsed ducts, spreading water stains, or DIY fixes that keep failing. |
| Get it diagnosed properly | Trucomfortaz’s NATE-certified technicians test airflow, humidity, and duct leakage before recommending sealing, insulation, or replacement. |
Table of Contents
- Why Ductwork Sweats: The Dew Point Problem
- Signs of Condensation on Ductwork and Why They Matter
- How to Check Your Ducts for Condensation Yourself
- Temporary Fixes While You Plan a Permanent Repair
- Permanent Solutions: Sealing, Insulation, and System Fixes
- When to Call a Professional for Sweating Ducts
- What Insulation R-Value and Airtightness Actually Prevent
- What We See Most Often in the Field
- How Tru Comfort Handles Sweating Ductwork in New River
- Sources
Why Ductwork Sweats: The Dew Point Problem
Every pocket of air holds water vapor, and the dew point is the exact temperature at which that air can no longer hold it, forcing the excess to condense into liquid. When a duct’s outer surface temperature falls below the dew point of the air surrounding it, water forms on that surface exactly the way it forms on a cold soda can. Ductwork carrying 55 degree supply air through a humid 85 degree attic is a textbook setup for that to happen.
Several common household conditions push ducts past that threshold:
- Missing or thin insulation. Bare or under-insulated metal trunk lines lose their thermal barrier fast, letting the duct surface track close to the air temperature inside it.
- Ducts running through unconditioned space. Attics, crawlspaces, garages, and unfinished basements swing in temperature and humidity far more than living space does, according to practical homeowner guidance on water in air ducts.
- Air leaks in the duct system. Gaps at joints and boots pull humid indoor or attic air directly onto cold duct surfaces, concentrating moisture right at the leak point.
- An oversized air conditioner. A unit that’s too big for the space cools the air quickly and shuts off before it has run long enough to actually pull humidity out, a cycle known as short-cycling.
- A clogged condensate drain or a dirty coil. Both force the system to work harder and run colder, and routine HVAC maintenance is one of the simplest ways to head this off.
- Restricted airflow. Closed registers, crushed flex duct, or a clogged filter all drop the temperature further at whatever point the air does manage to reach.
Sweating shows up most often in predictable spots: uninsulated metal trunks running through a hot attic, flex duct with thin or compressed insulation, the cold return plenum right at the air handler, and diffusers or boots where supply air first meets warm room air. That last spot deserves attention on its own. Diffuser sweating typically traces back to a wide gap between the supply air temperature and the surrounding room air, and field observations from HVAC technicians point to insulation blankets behind the diffuser and airflow adjustments as the most direct fix.
Signs of Condensation on Ductwork and Why They Matter
You’ll usually catch sweating ducts one of two ways: you see it, or you smell it. Visible signs include beads or full sheets of water on metal surfaces, insulation that’s gone damp or matted, rust forming at register boots, and water stains spreading across the ceiling or wall near a vent. A musty smell coming from your supply registers is often your first clue even before you spot a drip, and it usually means moisture has already been sitting somewhere in the system for a while.
Operational clues are easier to miss. Airflow feeling weaker than usual at certain registers, indoor humidity staying stubbornly high even while the air conditioner runs, or wet spots that appear specifically after a long cooling cycle all point to condensation happening somewhere out of sight.
None of this is cosmetic. Moisture sitting inside a duct system is one of the most reliable ways to grow mold indoors, and the EPA’s own guidance on mold prevention is blunt about it: controlling the moisture source is the only strategy that actually works long term. Beyond mold and indoor air quality, ongoing condensation corrodes metal ductwork, saturates and ruins insulation, and can lead to real structural damage in ceilings and walls if it goes unaddressed for months. A system fighting condensation is also a system working harder than it needs to, which shows up as higher energy bills every month the problem persists.
How to Check Your Ducts for Condensation Yourself
A little detective work before you call anyone tells you (and eventually a technician) a lot about what’s actually happening. Work through these steps in order:
- Start at the registers. Remove a few grilles with a screwdriver and look for beading, rust, or damp insulation just inside the boot.
- Check accessible insulation. Press gently on any exposed duct insulation you can reach; if it feels damp or looks matted down, moisture has already been there.
- Trace visible duct runs. In a garage, basement, or attic access point, use a flashlight (and a mirror for tight spots) to scan metal trunk lines and flex duct joints for wet spots or gaps.
- Measure indoor humidity. A basic hygrometer, the kind sold for under $20 at any hardware store, tells you whether you’re running above the 50 to 55 percent range that invites condensation.
- Check surface temperature where you can. An infrared thermometer aimed at a duct surface, compared against your hygrometer reading, tells you roughly how close that surface sits to the dew point.
- Inspect the condensate drain line. A clogged drain backs up moisture at the coil and is one of the more common hidden triggers.
Useful tools for this walk-through: a hygrometer, an infrared or contact thermometer, a flashlight, a small mirror, and a screwdriver for register covers. None of it requires special training.
Document what you find. Photograph every wet or stained spot, note which registers show moisture and which don’t, and write down your humidity and temperature readings with the date and time. That record is exactly what a technician needs to diagnose the problem quickly instead of starting from scratch, and it’s also useful background if you’re already troubleshooting why one room runs hotter than the rest of the house.
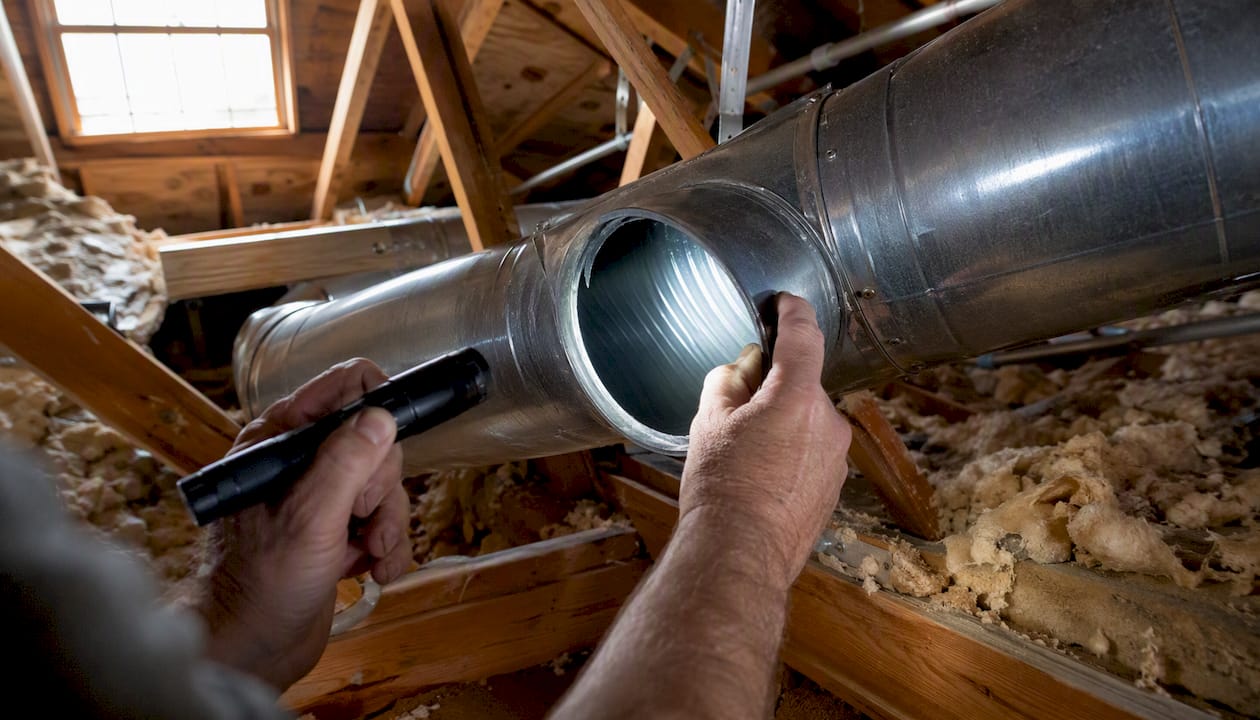
Pro Tip: If you suspect mold behind a register or in attic ductwork, don’t go poking around without a mask. Disturbing colonized mold releases spores into the air you’re about to breathe, and a cramped attic in Arizona summer heat is not a place to linger longer than you need to.
Skip the attic crawl entirely if the space is poorly lit, the temperature is dangerously high, or you’re not confident about where the joists are. That’s a job for someone equipped for it.
Temporary Fixes While You Plan a Permanent Repair
Short-term measures buy you time and limit damage while you sort out a longer-term repair. None of these substitute for fixing the root cause, but they stop the bleeding.
Start with humidity control, since it addresses the actual source rather than just the symptom:
- Run a portable or whole-home dehumidifier in the affected area to pull ambient humidity below 50 percent.
- Turn on bathroom and kitchen exhaust fans during and after showers or cooking, and actually let them run a few extra minutes.
- Open closed return vents and swap in a clean filter so the system isn’t laboring against restricted airflow.
- Clear a clogged condensate drain line, often with a wet/dry vacuum at the outdoor termination point, following the same troubleshooting logic used for condensate drain clogs.
For exposed duct sections you can safely reach, wrap them with the right materials:
- Use foil-faced duct insulation wrap or closed-cell foam pipe insulation rated for HVAC use.
- Seal seams with UL-rated mastic or foil tape, not standard cloth duct tape, which dries out and peels within a season.
- Wrap snugly but avoid compressing the insulation, since crushed insulation loses most of its R-value.
- Check your HVAC system’s warranty terms before modifying factory-installed insulation or duct components.
A wrap and a dehumidifier are the right call when the problem is limited moisture and you’re actively planning a permanent fix. They are not adequate on their own if you’re seeing visible mold growth, dripping that returns within days of drying it out, or staining that’s already spread into drywall or ceiling material. At that point you’re looking at a repair, not a stopgap.
Permanent Solutions: Sealing, Insulation, and System Fixes
Stopping sweating for good almost always means addressing airtightness and insulation together, not one or the other. A duct system can be perfectly insulated and still sweat if it’s leaking humid air at every joint, and it can be perfectly sealed and still sweat if the insulation is too thin for the climate it’s running through.
Professional-grade fixes typically include:
- Duct air sealing with mastic, applied by hand at accessible joints or, for ductwork that’s buried or otherwise unreachable, applied as an aerosol sealant that finds and closes leaks from the inside.
- Insulation upgrades matched to the climate and duct location, replacing thin or compressed wrap with insulation sized for the actual conditions the ducts run through.
- Replacement of damaged flex duct or fiberglass-lined metal duct that’s already wet or corroded, since insulation that’s been saturated once rarely dries out and performs correctly again.
- Vapor barrier additions where moisture is migrating through a permeable layer rather than just condensing on a cold surface.
- A dehumidifier tied into the HVAC system, or updated thermostat and control settings, for homes where humidity control is the bigger driver than duct insulation alone.
- A load calculation to check for oversizing, since a system that’s too big for the space short-cycles and never runs long enough to properly manage humidity.
Airtightness matters more than most homeowners assume. A duct system that leaks lets humid air infiltrate directly onto cold surfaces no matter how much insulation surrounds it, which is exactly why building-science researchers treat sealing as the prerequisite for insulation strategies like burying ducts in attic insulation to work at all, according to research on buried duct and conditioned-attic strategies.
When you bring in a contractor for this level of repair, ask specifically about a duct leakage test (sometimes called a duct blaster test), a psychrometric check of temperature and humidity through the system, and a coil and condensate inspection. A technician who skips straight to a insulation quote without testing leakage first isn’t giving you the full picture. Expect outcomes like reduced or eliminated condensation, better comfort, and lower energy bills, though some homes genuinely need partial duct replacement or relocation out of an unconditioned attic to get there. If your ductwork is old enough that replacement is already on the table, it’s worth reading about customized duct installation options before committing to another round of patch repairs.
When to Call a Professional for Sweating Ducts
Some situations are past the point where a weekend project fixes anything. Call an HVAC technician if you see any of the following:
- Visible mold growth inside vents, register boots, or on duct insulation itself.
- Dripping or beading that returns within a few days of drying it out and controlling humidity.
- Rusted, sagging, or partially collapsed metal ductwork.
- Water staining that has already spread beyond the immediate area around the duct, into drywall or a ceiling.
- Two or more DIY attempts at wrapping, sealing, or dehumidifying that haven’t resolved the sweating.
- Anyone in the household developing respiratory symptoms, congestion, or allergy flare-ups that seem tied to time spent indoors.
Bring your notes to that appointment. Photos of every wet spot, your humidity readings over a few days, and a rough timeline of when the sweating shows up (after long cooling cycles, only in certain rooms, only in summer) all help a technician skip straight to testing instead of guessing.
Ask specifically for a NATE-certified technician, since that certification reflects a standardized level of technical competency across the industry. Ask whether the visit includes a duct leakage test, and request a written diagnostic report with photos and a clear list of recommended repairs rather than a verbal “it needs sealing” and a quote. Rusted or heavily corroded metal ductwork, in particular, is one of the clearer signs that professional inspection and possible replacement beats another round of cleaning.
What Insulation R-Value and Airtightness Actually Prevent
The building-science research behind duct condensation is more specific than most homeowner advice lets on, and it’s worth knowing the actual numbers if you’re planning a real fix rather than another patch job. Field testing summarized in Building Science Insight’s “No Sweat” paper found that buried ducts avoid condensation reliably when insulated to R-13 in hot and mixed-humid climates, or R-8 in other climates, and when the duct system holds leakage under 5 percent at 25 pascals of pressure. That airtightness figure matters as much as the insulation number. A duct that leaks more than that lets humid air bypass the insulation entirely and condense directly on the metal underneath it.
Insulation also has to manage vapor, not just temperature. Materials are rated in perms, a measure of how easily water vapor passes through them, and a low-perm outer layer is what actually stops vapor from migrating into insulation and condensing there instead of on the duct surface. This is part of why mechanical insulation guidance treats insulation type, thickness, and vapor barrier placement as one connected system rather than three separate decisions. Skip the vapor barrier and even correctly sized insulation can fail.
Meeting minimum code R-value is not always enough on its own. Insulation selection needs to account for your actual local dew point and the supply air temperature running through the duct, according to Armadillo’s guidance on ductwork sweating, which is exactly why two homes with identical code-compliant insulation can have very different sweating outcomes depending on climate and system design.
| Climate context | Recommended duct insulation | Airtightness target |
|---|---|---|
| Hot and mixed-humid climates | R-13 | Under 5% leakage at 25 Pa |
| Other (drier or milder) climates | R-8 | Under 5% leakage at 25 Pa |
A buried-duct or conditioned-attic strategy, where ductwork sits inside attic insulation instead of below it, can work well when both targets are met. The caveat is that it fails quickly if either one is skipped: extremely airtight ducts with insufficient insulation still sweat, and heavily insulated but leaky ducts still let humid air reach the cold surface underneath.
What We See Most Often in the Field
The mistake we run into more than any other isn’t a homeowner ignoring sweating ducts. It’s a homeowner (or sometimes a well-meaning handyman) treating the visible symptom and stopping there. Someone finds mold on a duct, scrubs it off or sprays it with bleach, and calls the job done. Two months later the mold is back in the same spot, because nothing about the humidity or the air leak that fed it ever changed.
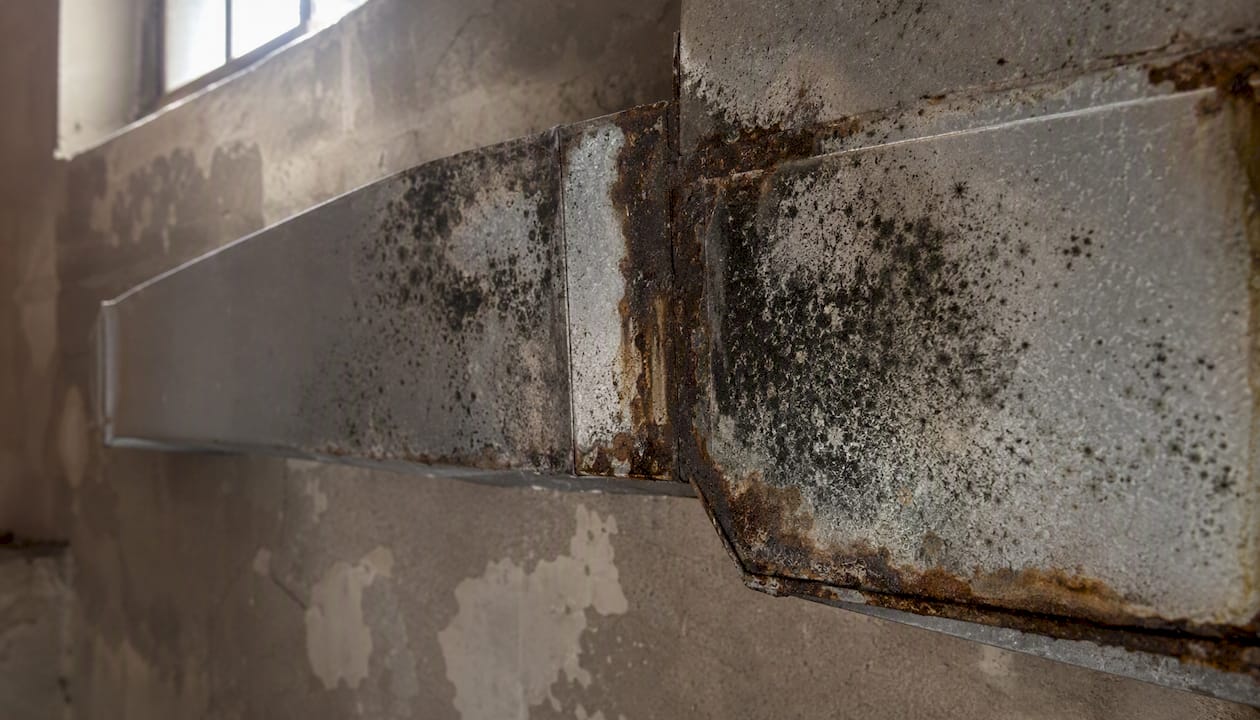
Mold cleanup without a moisture fix is just a delay, not a repair. Wiping down a duct surface removes what’s visible, but the underlying condition, whether that’s a leaky boot pulling in humid attic air or indoor humidity sitting at 65 percent all summer, keeps producing the exact conditions mold needs. Professional technicians see this pattern often enough that it’s become one of the more consistent field observations in the trade.
If you remember one thing from all of this, make it a simple priority order: fix moisture and airtightness before you worry about anything cosmetic. Chase the humidity source and the air leaks first. Everything else, insulation upgrades, register cleaning, cosmetic touch-ups, works better and lasts longer once that foundation is actually solid.
How Tru Comfort Handles Sweating Ductwork in New River
Diagnosing condensation on ductwork properly means testing, not guessing, and that’s where a full inspection pays for itself compared to another round of DIY patching. Trucomfortaz sends NATE-certified technicians to run a real diagnostic: airflow checks, humidity readings, coil and condensate drain inspection, and a look at exactly where your duct system is leaking or under-insulated. From there, the fix might be duct sealing, an insulation upgrade, a dehumidifier tied into your system, or in some cases replacing a section of damaged ductwork outright.

What sets a family-owned local shop apart is that our technicians aren’t working on commission, so the recommendation you get is the one your ductwork actually needs, not the most expensive option on the list. Trucomfortaz also offers maintenance plans that catch drain clogs and airflow restrictions before they turn into a sweating problem in the first place, plus emergency service for when a drip turns into standing water overnight. If you’re seeing condensation, rust, or musty odors from your vents, schedule an inspection through Tru Comfort’s HVAC services and get a written diagnosis before the moisture does more damage. You can also review the full Tru Comfort Advantage to see what’s included in a standard visit.
Sources
For homeowners who want to go deeper or share sourcing with a contractor, these references informed the guidance above:
- Insulation
- Mold course chapter 2 — U.S. Environmental Protection Agency
- Water in Air Ducts: Causes, Risks, and What to Do | Armadillo