Use our step-by-step DIY guide below to properly test your HVAC blower system with the help of a multimeter.
Necessary Tools And Materials
To perform this DIY task, you will need the following tools and materials:
- Multimeter.
- HVAC system user manual.
- Screwdriver set.
- Safety goggles.
- Insulated gloves.
How To Test Your Blower Motor With A Multimeter
Safety has to be any homeowner’s top priority when it comes to this project. The necessary safety precautions include making sure that the power to the HVAC system is turned off at the circuit breaker.
Additionally, you must wear safety goggles and insulated gloves to protect yourself from any potential electrical shocks and/or debris in the area. Always be sure to reference your owner’s manual for other safety instructions. Let’s go step-by-step to complete this task below.
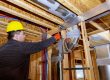
Step 1. Locate The Blower Motor
- You must start by locating your blower motor within the HVAC system.
- The blower motor is typically found behind the access panel.
- Use your screwdriver to remove the panel.
- This will expose your blower motor and its wiring.
Step 2. Set Up The Multimeter
- Turn on the multimeter, putting it to the appropriate setting.
- When testing the blower motor, you typically must set it to measure resistance (ohms) and voltage.
- Double check your owner’s manual so you know exactly how to set this up.
Step 3. Disconnect Blower Motor From Power Source
- Disconnect your blower motor from its power source, attaching the multimeter probes to the motor terminals.
- Any reading close to zero does indicate good continuity.
- This means the motor windings are indeed intact.
- An infinity reading means there ultimately may be a break in the winding.
Step 4. Measure Resistance
- While the blower motor is disconnected, it’s time to measure the resistance between your motor terminals.
- Compare the readings with the specifications outlined in the HVAC system’s manual.
- It is a problem if there is a significant deviation from the expected value.
Step 5. Test Capacitor
- For smooth operation, the blower motor will rely on a fully functioning capacitor.
- Set your multimeter to measure capacitance while connecting the probes to the capacitor terminals.
- Any reading that matches the capacitor’s rated value means it is functioning properly.
- The capacitor may need a full replacement if the reading is off.
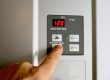
Step 6. Re-Check Voltage Supply
- Now, reconnect your blower motor and turn the power back on.
- Set the multimeter in order to measure your AC’s voltage.
- Carefully measure the voltage at the motor terminals when the HVAC system is running.
- The reading should match the voltage that is outlined in your manual.
- A significant discrepancy could indicate a variety of issues.
Conclusion
When your readings are off, it’s no secret there could be damage to the blower motor and HVAC system in general. Contact the experienced team at Tru Comfort Heating and Cooling today with any questions!
Tru Comfort Heating & Cooling In The Phoenix Valley
At Tru Comfort Heating & Cooling, we deliver reliable, efficient, and cost-effective solutions to enhance comfort and water quality. Whether you need HVAC installation, repair, maintenance, or water treatment solutions, our team is here to assist you every step of the way. Contact us today for exceptional service from an insured and bonded HVAC company. Experience reliable and efficient solutions that exceed your expectations.